This guide contains instructions for configuring PRTG Network Monitor software to send SNMP traps to a Omnibus.
Prerequisites:
- working Omnibus instance
- SNMP probe (mttrapd) installed and configured
More info on installing and configuring mttrapd.
First step is importing the MIB file.
PRTG Network monitor comes with a MIB file called PRTG-MIB.mib this file you can find in PRTG installation directory. Open mib manager utility to do the import.
/app/IBM/tivoli/netcool/omnibus/bin/nco_mibmanager
PRTG-MIB.mib is depending on SNMPv2-SMI , RFC-1215 and SNMPv2-TC MIB files, so make sure they are accessible. (all of them are in the default MIB set of Omnibus)
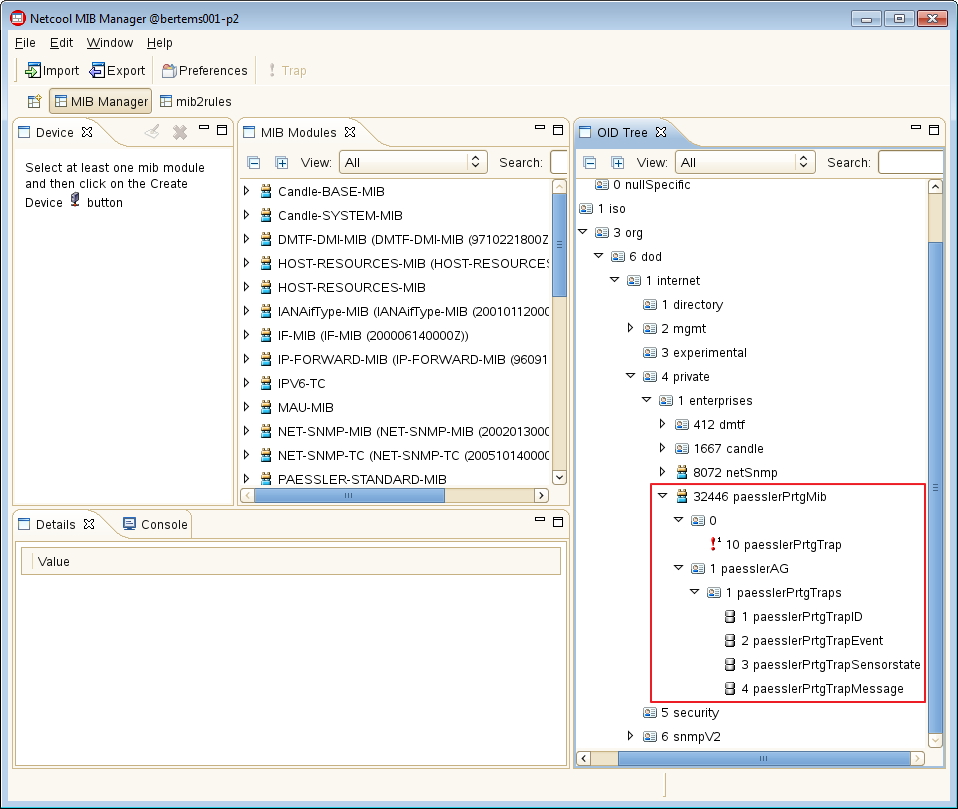
As we see , the trap OID is 0.10 (1.3.6.1.4.1.32446.0.10) , and other attributes can be defined with OIDs 1.1, 1.2, 1.3, and 1.4.
SNMP traps sent by PRTG always use SNMP V1 format. The following OIDs will be included in the trap:
1.3.6.1.4.1.32446.1.1.1: MessageID (as defined by the user in the Field “Message ID”)
1.3.6.1.4.1.32446.1.1.2: An integer representing the event that triggered the notification:
0 = State ended
1 = State started
2 = Volume reached
3 = Speed not reached
4 = Speed reached
5 = Threshold not reached
6 = Threshold reached
7 = Value changed
1.3.6.1.4.1.32446.1.1.3: The state of the object:
0 = None
1 = Unknown
2 = Collecting Data
3 = Up
4 = Warning
5 = Down
6 = No Probe
7 = Paused by User
8 = Paused by Dependency
9 = Paused by Schedule
10 = Unusual
11 = Paused by License
12 = Paused until
13 = Down (Acknowledged)
14 = Down (Partial)
1.3.6.1.4.1.32446.1.1.4: The message text of the notification as defined by the user.
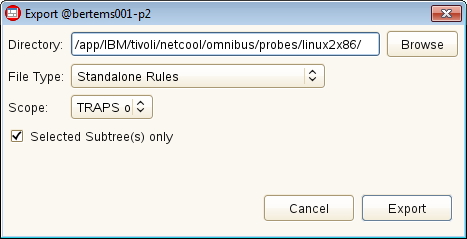
Select the top level enterprise OID from OID browser, click export rules file. Select location for the rules file, and choose rules file type.
Select standalone if you use this SNMP source only, or Netcool knowledge library to export master rules and include rules for more kind of sources.
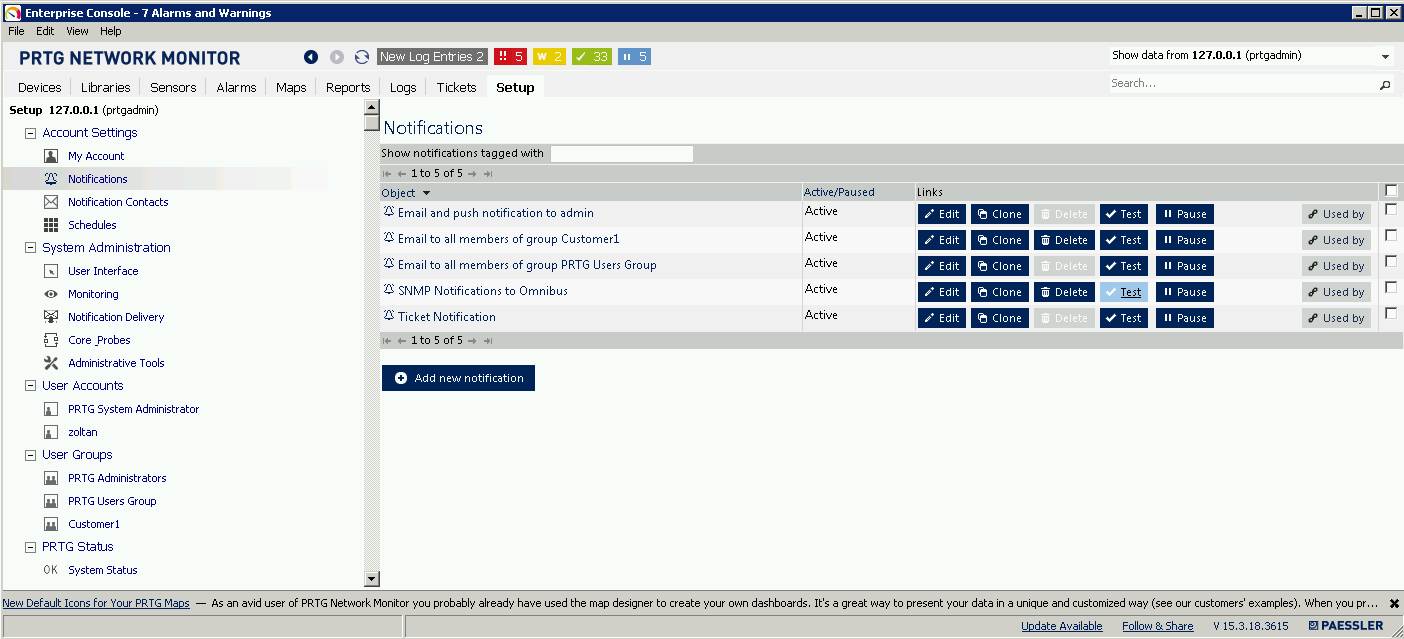
Now open PRTG Enterprise Console, and navigate to Setup -> Notifications and create a new notification type clicking “add new notification” button.
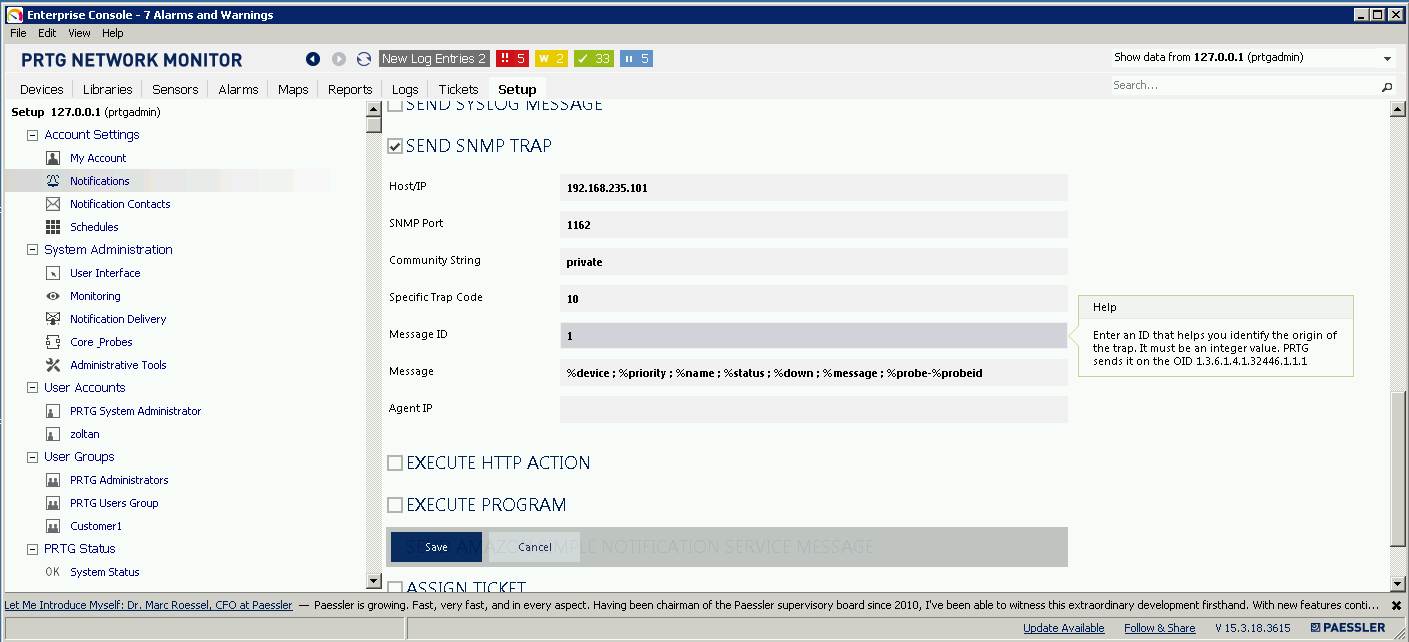
Select “Send SNMP Trap” option, and enter connection info:
- SNMP probe hostname or IP address
- Port
- Community string
- Specific Trap Code (10)
- Message ID (used for filtering)
- Message (configurable using PRTG specific parameters. See PRTG Help for info )
Save the notification and test it clicking “Test” button next to Notification you just created.
Now (if you’re lucky) an event pops up on Omnibus console.
This event is not formatted, ( fe.: Summary field is empty ) so you have to create mappings between PRTG Trap OID values and Omnibus fields. You can do it by editing the rules file you generated before.
Locate the following section :
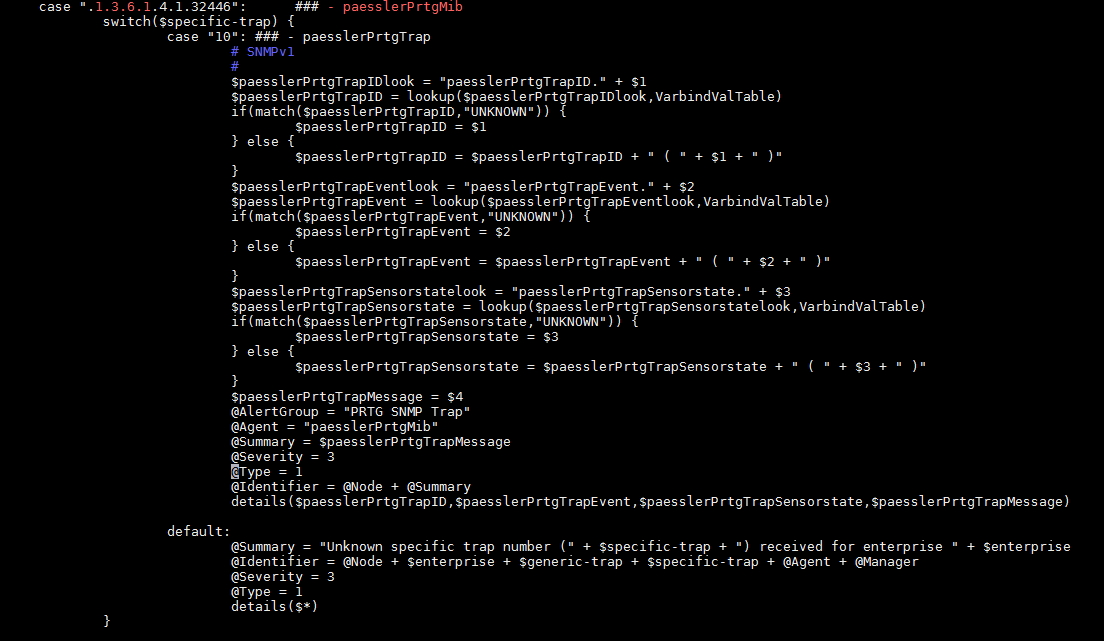
And edit the Omnibus fields ( @Agent, @Summary, etc. ) enter the information what you want to present on your console. The values of the four OIDs sent with the trap are
- 1.1 = $paesslerPrtgTrapID
- 1.2 = $paesslerPrtgTrapEvent
- 1.3 = $paesslerPrtgTrapSensorstate
- 1.4 = $paesslerPrtgTrapMessage
In our example Summary field will contain the value of paesslerPrtgTrapMessage OID, but you can customize other fields as well.
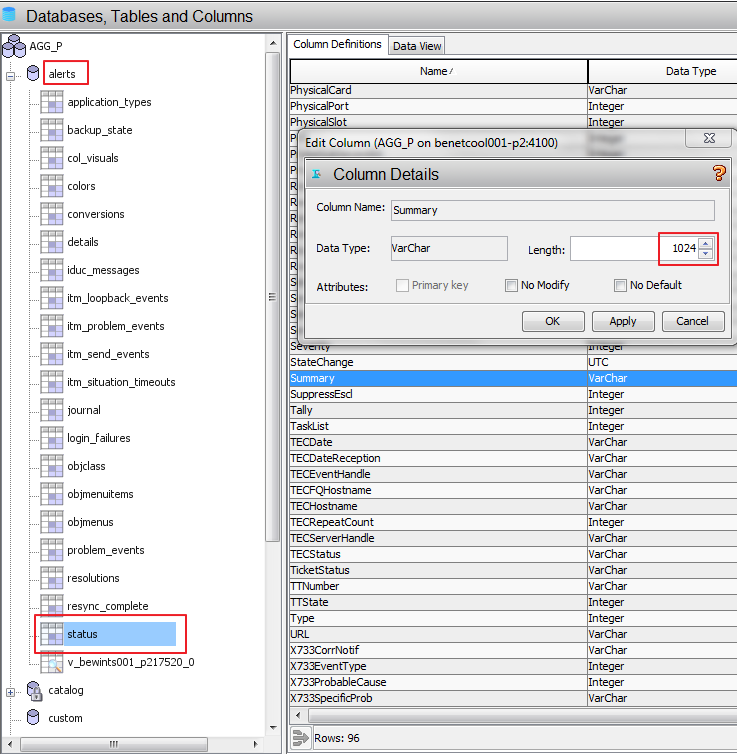
Modifications Required on Omnibus Server
Extend the size of the Summary filed in the Alerts table from 255 to at least 1024 as PRTG sends long problem descriptions and it won’t fit into the 255 character default.
 In order to make it work with the SNMP probe modify the probe’s def file located in /opt/IBM/tivoli/netcool/omnibus/var/
Replace the value from 255 to 1024:
Identifier 2 255 1
Serial 0 4 0
Node 2 64 0
NodeAlias 2 64 0
Manager 2 64 0
Agent 2 64 0
AlertGroup 2 255 0
AlertKey 2 255 0
Severity 0 4 0
Summary 2 1024 0
StateChange 1 4 0
FirstOccurrence 1 4 0
LastOccurrence 1 4 0
InternalLast 1 4 0
Poll 0 4 0
Restart the probe.
And the final result :
