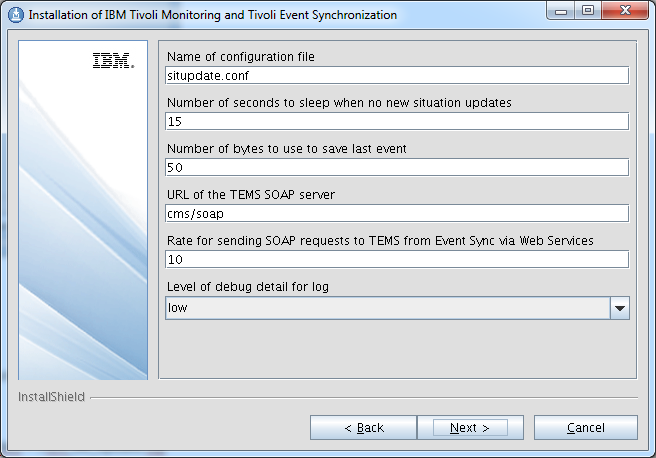
The IBM Tivoli Monitoring Agent for Netcool/Omnibus 8.1 is located in the IBM Tivoli Monitoring Agent for Netcool/Omnibus 8.1 eAssembly ( CRS7KML ) bundle. We used SLES 11 SP3 as our installation platform.
Installing the IBM Tivoli Monitoring Agent for Netcool/Omnibus 8.1 agent support on the ITM server(s).
First install the product support for TEPS, TEMS. We have a one box test system running ITM 6.3.0.4 so we will only have to perform the product support installation in this one server. We will install the following packages:
Tivoli Enterprise Portal Browser Client support
Tivoli Enterprise Portal Desktop Client support
Tivoli Enterprise Portal Server support
Tivoli Enterprise Monitoring Server support
Start the installation by executing install.sh from the installation media.
HUITM001-P1:/Downloads/TIVOLI-IMAGES/OMNIBUS8-PACK/agent # ./install.sh
INSTALL
Enter the name of the IBM Tivoli Monitoring directory
[ default = /opt/IBM/ITM ]: /app/IBM/ITM
ITM home directory “/app/IBM/ITM” already exists.
OK to use it [ 1-yes, 2-no; “1” is default ]? 1
The following processes are currently running:
Product = Tivoli Enterprise Monitoring Server PID = 4206
Product = Tivoli Enterprise Monitoring Automation Server PID = 4532
Product = IBM Eclipse Help Server PID = 4836
Product = Tivoli Enterprise Portal Server PID = 4928
Product = Warehouse Proxy PID = 5371
Product = Monitoring Agent for Linux OS PID = 5857
Product = Summarization and Pruning Agent PID = 16319
install.sh warning: Existing products found to be running will be restarted during installation., continuing …
Continue with this installation [ 1-yes, 2-no; “1” is default ]? 1
Stopping TEMS…
It can take up to ten minutes.
TEMS stopped…
Processing. Please wait…
Stopping Tivoli Enterprise Monitoring Automation Server …
Product Tivoli Enterprise Monitoring Automation Server was stopped gracefully.
Agent stopped…
Processing. Please wait…
Stopping IBM Eclipse Help Server …
Product IBM Eclipse Help Server was stopped gracefully.
Agent stopped…
Processing. Please wait…
Stopping Tivoli Enterprise Portal Server …
Product Tivoli Enterprise Portal Server was stopped gracefully.
KCIIN0196E Agent is not running…
Processing. Please wait…
Stopping Warehouse Proxy …
Product Warehouse Proxy was stopped gracefully.
Agent stopped…
Processing. Please wait…
Stopping Watchdog process…
Watchdog process was stopped.
Stopping Monitoring Agent for Linux OS …
Product Monitoring Agent for Linux OS was stopped gracefully.
Agent stopped…
Processing. Please wait…
Stopping Summarization and Pruning Agent …
Product Summarization and Pruning Agent was stopped gracefully.
Agent stopped…
/app/IBM/ITM
Select one of the following:
1) Install products to the local host.
2) Install products to depot for remote deployment (requires TEMS).
3) Install TEMS support for remote seeding
4) Exit install.
Please enter a valid number: 1
Initializing …
International Program License Agreement
Part 1 – General Terms
BY DOWNLOADING, INSTALLING, COPYING, ACCESSING, OR USING
THE PROGRAM YOU AGREE TO THE TERMS OF THIS AGREEMENT. IF
YOU ARE ACCEPTING THESE TERMS ON BEHALF OF ANOTHER PERSON
OR A COMPANY OR OTHER LEGAL ENTITY, YOU REPRESENT AND
WARRANT THAT YOU HAVE FULL AUTHORITY TO BIND THAT PERSON,
COMPANY, OR LEGAL ENTITY TO THESE TERMS. IF YOU DO NOT
AGREE TO THESE TERMS,
– DO NOT DOWNLOAD, INSTALL, COPY, ACCESS, OR USE THE
PROGRAM; AND
Press Enter to continue viewing the license agreement, or
enter “1” to accept the agreement, “2” to decline it, “3”
to print it, “4” to read non-IBM terms, or “99” to go back
to the previous screen.
1
Product packages are available in /Downloads/TIVOLI-IMAGES/OMNIBUS8-PACK/agent/unix
The following products are currently installed in “/app/IBM/ITM”:
Agentless Monitoring for AIX Operating Systems V06.30.04.00 @ Tivoli Enterprise Portal Browser Client support
Agentless Monitoring for AIX Operating Systems V06.30.04.00 @ Tivoli Enterprise Portal Desktop Client support
Agentless Monitoring for AIX Operating Systems V06.30.04.00 @ Tivoli Enterprise Portal Server support
Agentless Monitoring for HP-UX Operating Systems V06.30.04.00 @ Tivoli Enterprise Portal Browser Client support
Agentless Monitoring for HP-UX Operating Systems V06.30.04.00 @ Tivoli Enterprise Portal Desktop Client support
Agentless Monitoring for HP-UX Operating Systems V06.30.04.00 @ Tivoli Enterprise Portal Server support
Agentless Monitoring for Linux Operating Systems V06.30.04.00 @ Tivoli Enterprise Portal Browser Client support
Agentless Monitoring for Linux Operating Systems V06.30.04.00 @ Tivoli Enterprise Portal Desktop Client support
Agentless Monitoring for Linux Operating Systems V06.30.04.00 @ Tivoli Enterprise Portal Server support
Agentless Monitoring for Solaris Operating Systems V06.30.04.00 @ Tivoli Enterprise Portal Browser Client support
Agentless Monitoring for Solaris Operating Systems V06.30.04.00 @ Tivoli Enterprise Portal Desktop Client support
Agentless Monitoring for Solaris Operating Systems V06.30.04.00 @ Tivoli Enterprise Portal Server support
Agentless Monitoring for Windows Operating Systems V06.30.04.00 @ Tivoli Enterprise Portal Browser Client support
Agentless Monitoring for Windows Operating Systems V06.30.04.00 @ Tivoli Enterprise Portal Desktop Client support
Agentless Monitoring for Windows Operating Systems V06.30.04.00 @ Tivoli Enterprise Portal Server support
IBM Eclipse Help Server V06.30.04.00 @ Linux Intel R2.6, R3.0 (32 bit)/Intel R2.6 GCC 2.9.5 (64 bit)/Intel R2.6, R3.0 (64 bit)/x86_64 R2.6, R3.0 (32 bit)/x86_64 R2.6, R3.0 (64 bit)
IBM GSKit Security Interface V08.00.50.20 @ Linux x86_64 R2.6, R3.0 (64 bit)
IBM HTTP Server V08.00.06.00 @ Linux x86_64 R2.6, R3.0 (64 bit)
IBM Installation Manager V01.06.03.01 @ Linux x86_64 R2.6, R3.0 (64 bit)
IBM Tivoli Enterprise Portal Server Extensions V08.00.06.00 @ Linux x86_64 R2.6, R3.0 (64 bit)
Monitoring Agent for IBM Tivoli Monitoring 5.x Endpoint V06.23.05.00 @ Tivoli Enterprise Portal Server support
Monitoring Agent for Linux OS V06.30.04.00 @ Linux x86_64 R2.6, R3.0 (64 bit)
Monitoring Agent for Linux OS V06.30.04.00 @ Tivoli Enterprise Portal Browser Client support
Monitoring Agent for Linux OS V06.30.04.00 @ Tivoli Enterprise Portal Desktop Client support
Monitoring Agent for Linux OS V06.30.04.00 @ Tivoli Enterprise Portal Server support
Monitoring Agent for TADDM Serviceability and Manageability V07.22.00.00 @ Tivoli Enterprise Portal Browser Client support
Monitoring Agent for TADDM Serviceability and Manageability V07.22.00.00 @ Tivoli Enterprise Portal Desktop Client support
Monitoring Agent for TADDM Serviceability and Manageability V07.22.00.00 @ Tivoli Enterprise Portal Server support
Monitoring Agent for UNIX Logs V06.23.05.00 @ Tivoli Enterprise Portal Browser Client support
Monitoring Agent for UNIX Logs V06.23.05.00 @ Tivoli Enterprise Portal Desktop Client support
Monitoring Agent for UNIX Logs V06.23.05.00 @ Tivoli Enterprise Portal Server support
Monitoring Agent for UNIX OS V06.30.04.00 @ Tivoli Enterprise Portal Browser Client support
Monitoring Agent for UNIX OS V06.30.04.00 @ Tivoli Enterprise Portal Desktop Client support
Monitoring Agent for UNIX OS V06.30.04.00 @ Tivoli Enterprise Portal Server support
Monitoring Agent for Windows OS V06.30.04.00 @ Tivoli Enterprise Portal Browser Client support
Monitoring Agent for Windows OS V06.30.04.00 @ Tivoli Enterprise Portal Desktop Client support
Monitoring Agent for Windows OS V06.30.04.00 @ Tivoli Enterprise Portal Server support
Monitoring Agent for i5/OS V06.30.04.00 @ Tivoli Enterprise Portal Browser Client support
Monitoring Agent for i5/OS V06.30.04.00 @ Tivoli Enterprise Portal Desktop Client support
Monitoring Agent for i5/OS V06.30.04.00 @ Tivoli Enterprise Portal Server support
Summarization and Pruning Agent V06.30.04.00 @ Linux x86_64 R2.6, R3.0 (64 bit)
Summarization and Pruning Agent V06.30.04.00 @ Tivoli Enterprise Portal Browser Client support
Summarization and Pruning Agent V06.30.04.00 @ Tivoli Enterprise Portal Desktop Client support
Summarization and Pruning Agent V06.30.04.00 @ Tivoli Enterprise Portal Server support
TEC GUI Integration V06.30.04.00 @ Tivoli Enterprise Portal Browser Client support
TEC GUI Integration V06.30.04.00 @ Tivoli Enterprise Portal Desktop Client support
TEC GUI Integration V06.30.04.00 @ Tivoli Enterprise Portal Server support
Tivoli Enterprise Monitoring Automation Server V06.30.04.00 @ Linux x86_64 R2.6, R3.0 (64 bit)
Tivoli Enterprise Monitoring SOAP Server V06.30.04.00 @ Linux x86_64 R2.6, R3.0 (64 bit)
Tivoli Enterprise Monitoring Server V06.30.04.00 @ Linux x86_64 R2.6, R3.0 (64 bit)
Tivoli Enterprise Portal Browser Client V06.30.04.00 @ Linux x86_64 R2.6, R3.0 (64 bit)
Tivoli Enterprise Portal Desktop Client V06.30.04.00 @ Linux x86_64 R2.6, R3.0 (64 bit)
Tivoli Enterprise Portal Server V06.30.04.00 @ Linux x86_64 R2.6, R3.0 (64 bit)
Tivoli Enterprise Services User Interface Extensions V06.30.04.00 @ Linux x86_64 R2.6, R3.0 (64 bit)
Tivoli Enterprise Services User Interface V06.30.04.00 @ Linux x86_64 R2.6, R3.0 (64 bit)
Tivoli Performance Analyzer V06.30.04.00 @ Tivoli Enterprise Portal Browser Client support
Tivoli Performance Analyzer V06.30.04.00 @ Tivoli Enterprise Portal Desktop Client support
Tivoli Performance Analyzer V06.30.04.00 @ Tivoli Enterprise Portal Server support
Universal Agent V06.23.05.00 @ Tivoli Enterprise Portal Browser Client support
Universal Agent V06.23.05.00 @ Tivoli Enterprise Portal Desktop Client support
Universal Agent V06.23.05.00 @ Tivoli Enterprise Portal Server support
Warehouse Proxy V06.30.04.00 @ Linux x86_64 R2.6, R3.0 (64 bit)
Warehouse Proxy V06.30.04.00 @ Tivoli Enterprise Portal Browser Client support
Warehouse Proxy V06.30.04.00 @ Tivoli Enterprise Portal Desktop Client support
Warehouse Proxy V06.30.04.00 @ Tivoli Enterprise Portal Server support
All agents require that application support files that contain agent-specific information be installed on the Tivoli Enterprise Monitoring Server that the agents will connect to, Tivoli Enterprise Portal Server and Tivoli Enterprise Portal desktop and browser client. Install application support before starting to install any Tivoli Enterprise Monitoring Agents.
Product packages are available for this operating system and component support categories:
1) IBM Tivoli Monitoring components for this operating system
2) Tivoli Enterprise Portal Browser Client support
3) Tivoli Enterprise Portal Desktop Client support
4) Tivoli Enterprise Portal Server support
5) Tivoli Enterprise Monitoring Server support
6) Other operating systems
Type the number or type “q” to quit selection
[ number “1” or “IBM Tivoli Monitoring components for this operating system” is default ]: 2
You selected number “2” or “Tivoli Enterprise Portal Browser Client support”
Is the selection correct [ 1=Yes, 2=No ; default is “1” ] ? 1
The following application supports are available for installation:
1) Monitoring Agent for Tivoli Netcool/OMNIbus V07.40.00.00
2) all of the above
Type the numbers that correspond to the products that you want to install. Type “b” to change operating system, or type “q” to quit selection.
If you enter more than one number, separate the numbers by a comma or a space.
Type your selections here: 1
The following products will be installed:
Monitoring Agent for Tivoli Netcool/OMNIbus V07.40.00.00
Are your selections correct [ 1=Yes, 2=No ; default is “1” ] ? 1
… installing “Monitoring Agent for Tivoli Netcool/OMNIbus V07.40.00.00 for Tivoli Enterprise Portal Browser Client support”; please wait.
=> installed “Monitoring Agent for Tivoli Netcool/OMNIbus V07.40.00.00 for Tivoli Enterprise Portal Browser Client support”.
… Initializing component Monitoring Agent for Tivoli Netcool/OMNIbus V07.40.00.00 for Tivoli Enterprise Portal Browser Client support.
… Monitoring Agent for Tivoli Netcool/OMNIbus V07.40.00.00 for Tivoli Enterprise Portal Browser Client support initialized.
Do you want to install additional products or product support packages [ 1=Yes, 2=No ; default is “2” ] ? 1
Product packages are available for this operating system and component support categories:
1) IBM Tivoli Monitoring components for this operating system
2) Tivoli Enterprise Portal Browser Client support
3) Tivoli Enterprise Portal Desktop Client support
4) Tivoli Enterprise Portal Server support
5) Tivoli Enterprise Monitoring Server support
6) Other operating systems
Type the number or type “q” to quit selection
[ number “1” or “IBM Tivoli Monitoring components for this operating system” is default ]: 3
You selected number “3” or “Tivoli Enterprise Portal Desktop Client support”
Is the selection correct [ 1=Yes, 2=No ; default is “1” ] ? 1
The following application supports are available for installation:
1) Monitoring Agent for Tivoli Netcool/OMNIbus V07.40.00.00
2) all of the above
Type the numbers that correspond to the products that you want to install. Type “b” to change operating system, or type “q” to quit selection.
If you enter more than one number, separate the numbers by a comma or a space.
Type your selections here: 1
The following products will be installed:
Monitoring Agent for Tivoli Netcool/OMNIbus V07.40.00.00
Are your selections correct [ 1=Yes, 2=No ; default is “1” ] ? 1
… installing “Monitoring Agent for Tivoli Netcool/OMNIbus V07.40.00.00 for Tivoli Enterprise Portal Desktop Client support”; please wait.
=> installed “Monitoring Agent for Tivoli Netcool/OMNIbus V07.40.00.00 for Tivoli Enterprise Portal Desktop Client support”.
… Initializing component Monitoring Agent for Tivoli Netcool/OMNIbus V07.40.00.00 for Tivoli Enterprise Portal Desktop Client support.
… Monitoring Agent for Tivoli Netcool/OMNIbus V07.40.00.00 for Tivoli Enterprise Portal Desktop Client support initialized.
Do you want to install additional products or product support packages [ 1=Yes, 2=No ; default is “2” ] ? 1
Product packages are available for this operating system and component support categories:
1) IBM Tivoli Monitoring components for this operating system
2) Tivoli Enterprise Portal Browser Client support
3) Tivoli Enterprise Portal Desktop Client support
4) Tivoli Enterprise Portal Server support
5) Tivoli Enterprise Monitoring Server support
6) Other operating systems
Type the number or type “q” to quit selection
[ number “1” or “IBM Tivoli Monitoring components for this operating system” is default ]: 4
You selected number “4” or “Tivoli Enterprise Portal Server support”
Is the selection correct [ 1=Yes, 2=No ; default is “1” ] ? 1
The following application supports are available for installation:
1) Monitoring Agent for Tivoli Netcool/OMNIbus V07.40.00.00
2) all of the above
Type the numbers that correspond to the products that you want to install. Type “b” to change operating system, or type “q” to quit selection.
If you enter more than one number, separate the numbers by a comma or a space.
Type your selections here: 1
The following products will be installed:
Monitoring Agent for Tivoli Netcool/OMNIbus V07.40.00.00
Are your selections correct [ 1=Yes, 2=No ; default is “1” ] ? 1
… installing “Monitoring Agent for Tivoli Netcool/OMNIbus V07.40.00.00 for Tivoli Enterprise Portal Server support”; please wait.
=> installed “Monitoring Agent for Tivoli Netcool/OMNIbus V07.40.00.00 for Tivoli Enterprise Portal Server support”.
… Initializing component Monitoring Agent for Tivoli Netcool/OMNIbus V07.40.00.00 for Tivoli Enterprise Portal Server support.
… Monitoring Agent for Tivoli Netcool/OMNIbus V07.40.00.00 for Tivoli Enterprise Portal Server support initialized.
Do you want to install additional products or product support packages [ 1=Yes, 2=No ; default is “2” ] ? 1
Product packages are available for this operating system and component support categories:
1) IBM Tivoli Monitoring components for this operating system
2) Tivoli Enterprise Portal Browser Client support
3) Tivoli Enterprise Portal Desktop Client support
4) Tivoli Enterprise Portal Server support
5) Tivoli Enterprise Monitoring Server support
6) Other operating systems
Type the number or type “q” to quit selection
[ number “1” or “IBM Tivoli Monitoring components for this operating system” is default ]: 5
You selected number “5” or “Tivoli Enterprise Monitoring Server support”
Is the selection correct [ 1=Yes, 2=No ; default is “1” ] ? 1
The following application supports are available for installation:
1) Monitoring Agent for Tivoli Netcool/OMNIbus V07.40.00.00
2) all of the above
Type the numbers that correspond to the products that you want to install. Type “b” to change operating system, or type “q” to quit selection.
If you enter more than one number, separate the numbers by a comma or a space.
Type your selections here: 1
The following products will be installed:
Monitoring Agent for Tivoli Netcool/OMNIbus V07.40.00.00
Are your selections correct [ 1=Yes, 2=No ; default is “1” ] ? 1
… installing “Monitoring Agent for Tivoli Netcool/OMNIbus V07.40.00.00 for Tivoli Enterprise Monitoring Server support”; please wait.
=> installed “Monitoring Agent for Tivoli Netcool/OMNIbus V07.40.00.00 for Tivoli Enterprise Monitoring Server support”.
… Initializing component Monitoring Agent for Tivoli Netcool/OMNIbus V07.40.00.00 for Tivoli Enterprise Monitoring Server support.
… Monitoring Agent for Tivoli Netcool/OMNIbus V07.40.00.00 for Tivoli Enterprise Monitoring Server support initialized.
Do you want to install additional products or product support packages [ 1=Yes, 2=No ; default is “2” ] ?
… postprocessing; please wait.
… running /app/IBM/ITM/lx8266/cq/bin/helpmerg.sh
… finished postprocessing.
Installation step complete.
Following Tivoli Enterprise Monitoring Server product support were installed:
*) Monitoring Agent for Tivoli Netcool/OMNIbus
Note: This operation causes the monitoring server to restart.
Do you want to seed product support on the Tivoli Enterprise Monitoring Server? [ 1=Yes, 2=No ; default is “1” ] ?
Starting TEMS…
TEMS started…
The following new Tivoli Enterprise Monitoring Server product support packages will be seeded:
*) Monitoring Agent for Tivoli Netcool/OMNIbus
Choose one of the following options to add or update the situation distribution definition to include the default managed system groups:
1) ALL – This option adds the default managed system groups to all the applicable situations. Note that not all situations have the default managed group setting. For some, you might need to manually define the distribution in the Tivoli Enterprise Portal due to the specific content of the agent support package.
2) NONE – The default managed system group is not added to any situation.
Type your selections here [ number “1” or “ALL” is default ]:
1
Seeding support for Monitoring Agent for Tivoli Netcool/OMNIbus [1 of 1]
Product support seeding completed…
Stopping TEMS…
TEMS stopped…
All supports successfully seeded.
As a reminder, you should install product support on each of your TEM servers for any agents you have just installed.
This is done via the “/app/IBM/ITM/bin/itmcmd support” command on your TEM servers.
You may now configure any locally installed IBM Tivoli Monitoring product via the “/app/IBM/ITM/bin/itmcmd config” command.
insserv: warning: current start runlevel(s) (3 5) of script `vboxadd-x11′ overwrites defaults (empty).
insserv: Service network is missed in the runlevels 4 to use service ctrmc
insserv: Service syslog is missed in the runlevels 4 to use service ctrmc
Starting TEMS…
It can take up to ten minutes.
TEMS started…
Processing. Please wait…
Starting Tivoli Enterprise Monitoring Automation Server …
Tivoli Enterprise Monitoring Automation Server started
Processing. Please wait…
Starting IBM Eclipse Help Server …
IBM Eclipse Help Server started
Processing. Please wait…
Starting Tivoli Enterprise Portal Server …
Eclipse Help Server is required by Tivoli Enterprise Portal Server (TEPS) and will be started…
Eclipse Help Server is already started.
Tivoli Enterprise Portal Server started
Processing. Please wait…
Starting Warehouse Proxy …
Warehouse Proxy started
Processing. Please wait…
Starting Summarization and Pruning Agent …
Summarization and Pruning Agent started
Processing. Please wait…
Starting Monitoring Agent for Linux OS …
Monitoring Agent for Linux OS started
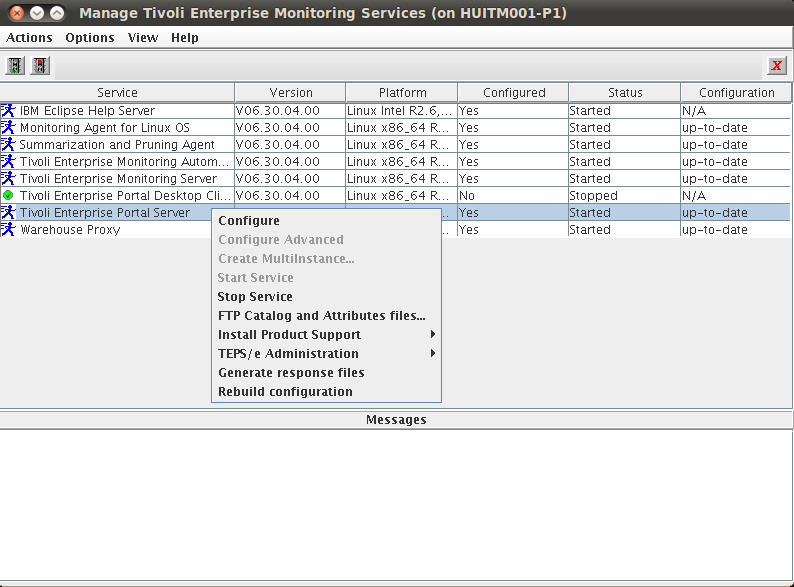
Reconfigure teps to complete the product support installation. Start the Manage Tivoli Enterprise Monitoring services console on the ITM server using the $CANDLEDIR/bin/itmcmd manage & command then right click Tivoli Enterprise Portal Server and select Configure from the drop down menu.
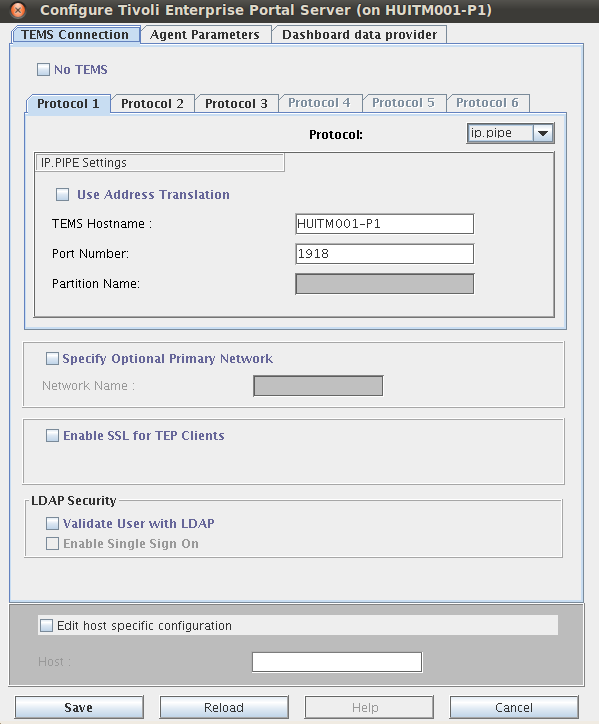
 TEPS will have to be stopped during configuration.
 Click OK at the next popup window.
 Click Save at the next window. Basically you do not want to change any parameters here, only want to reconfiguration to run and detect and include the new product support jar files. This procedure could take quite a while, so be patient.
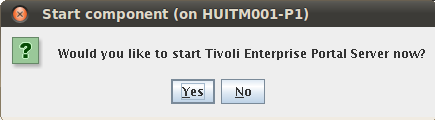
 Once the configuration is done, click Yes to start the TEPS server.
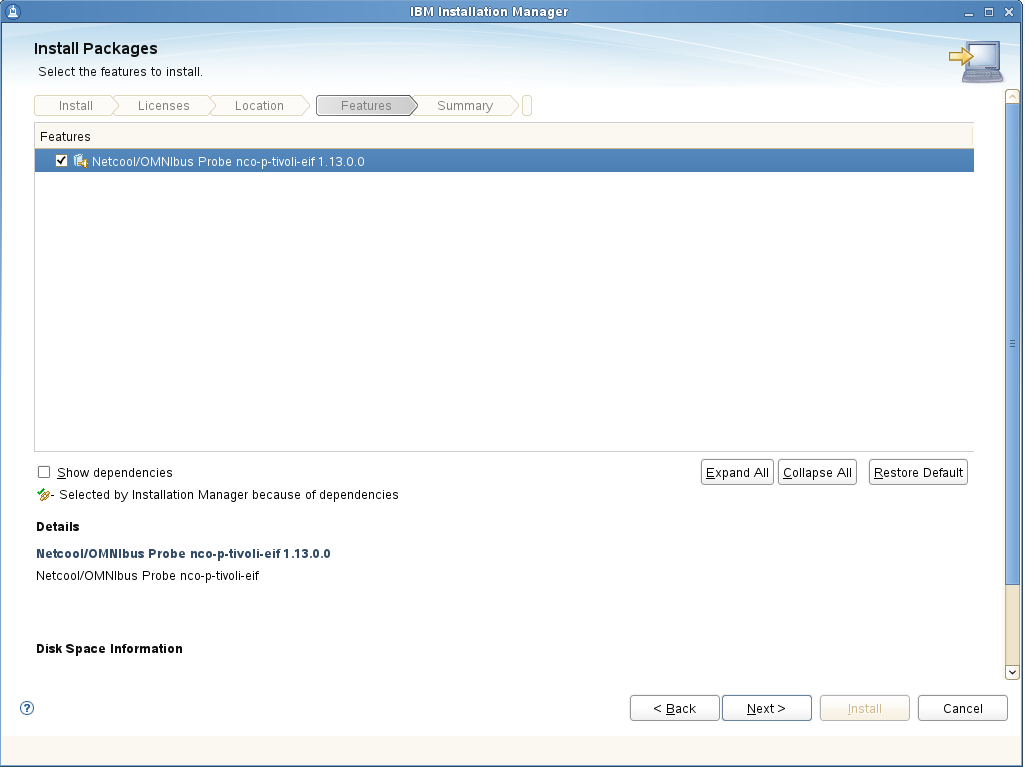
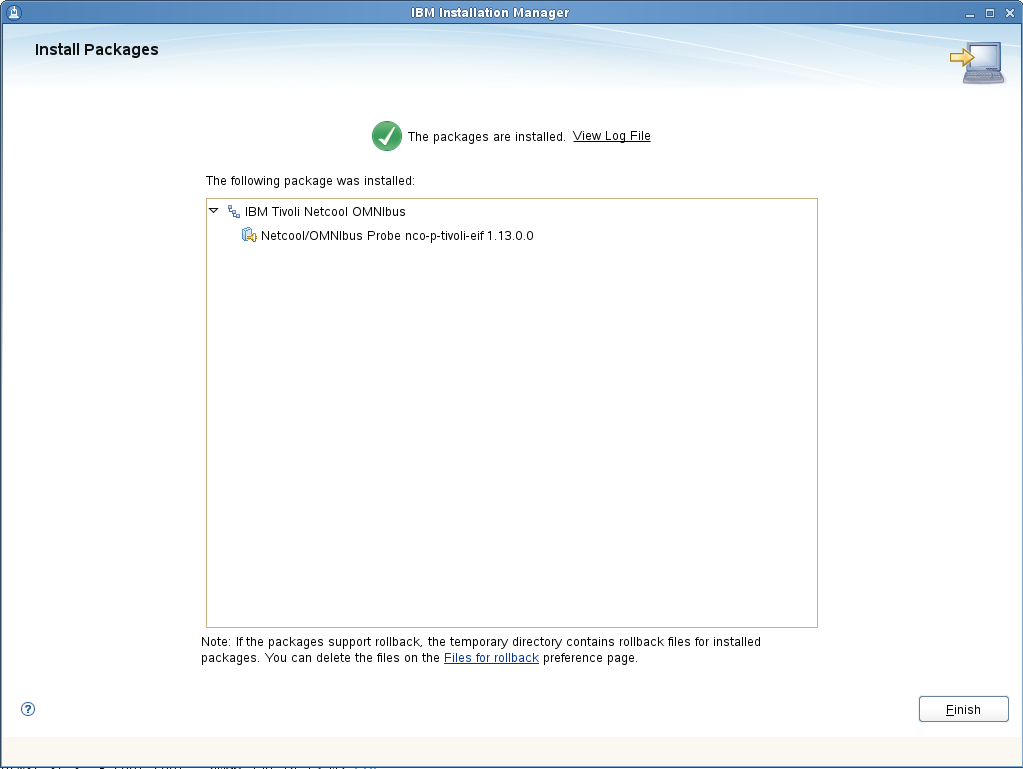
Installing the IBM Tivoli Monitoring Agent for Netcool/Omnibus 8.1.
Start the monitoring agent installation on your omnibus server using install.sh
HUOMNIBUS001-P1:/Downloads/TIVOLI-IMAGES/OMNIBUS8-PACK/agent # ./install.sh
INSTALL
Enter the name of the IBM Tivoli Monitoring directory
[ default = /opt/IBM/ITM ]: /app/IBM/ITM
ITM home directory “/app/IBM/ITM” already exists.
OK to use it [ 1-yes, 2-no; “1” is default ]?
The following processes are currently running:
Product = Monitoring Agent for Linux OS PID = 3773
install.sh warning: Existing products found to be running will be restarted during installation., continuing …
Continue with this installation [ 1-yes, 2-no; “1” is default ]? 1
Processing. Please wait…
Stopping Watchdog process…
Watchdog process was stopped.
Stopping Monitoring Agent for Linux OS …
Product Monitoring Agent for Linux OS was stopped gracefully.
Agent stopped…
/app/IBM/ITM
Select one of the following:
1) Install products to the local host.
2) Install products to depot for remote deployment (requires TEMS).
3) Install TEMS support for remote seeding
4) Exit install.
Please enter a valid number: 1
Initializing …
International Program License Agreement
Part 1 – General Terms
BY DOWNLOADING, INSTALLING, COPYING, ACCESSING, OR USING
THE PROGRAM YOU AGREE TO THE TERMS OF THIS AGREEMENT. IF
YOU ARE ACCEPTING THESE TERMS ON BEHALF OF ANOTHER PERSON
OR A COMPANY OR OTHER LEGAL ENTITY, YOU REPRESENT AND
WARRANT THAT YOU HAVE FULL AUTHORITY TO BIND THAT PERSON,
COMPANY, OR LEGAL ENTITY TO THESE TERMS. IF YOU DO NOT
AGREE TO THESE TERMS,
– DO NOT DOWNLOAD, INSTALL, COPY, ACCESS, OR USE THE
PROGRAM; AND
Press Enter to continue viewing the license agreement, or
enter “1” to accept the agreement, “2” to decline it, “3”
to print it, “4” to read non-IBM terms, or “99” to go back
to the previous screen.
1
Product packages are available in /Downloads/TIVOLI-IMAGES/OMNIBUS8-PACK/agent/unix
The following products are currently installed in “/app/IBM/ITM”:
IBM GSKit Security Interface V08.00.50.20 @ Linux x86_64 R2.6, R3.0 (64 bit)
Monitoring Agent for Linux OS V06.30.04.00 @ Linux x86_64 R2.6, R3.0 (64 bit)
Tivoli Enterprise Services User Interface V06.30.04.00 @ Linux x86_64 R2.6, R3.0 (64 bit)
All agents require that application support files that contain agent-specific information be installed on the Tivoli Enterprise Monitoring Server that the agents will connect to, Tivoli Enterprise Portal Server and Tivoli Enterprise Portal desktop and browser client. Install application support before starting to install any Tivoli Enterprise Monitoring Agents.
Product packages are available for this operating system and component support categories:
1) IBM Tivoli Monitoring components for this operating system
2) Tivoli Enterprise Portal Browser Client support
3) Tivoli Enterprise Portal Desktop Client support
4) Tivoli Enterprise Portal Server support
5) Tivoli Enterprise Monitoring Server support
6) Other operating systems
Type the number or type “q” to quit selection
[ number “1” or “IBM Tivoli Monitoring components for this operating system” is default ]: 1
You selected number “1” or “IBM Tivoli Monitoring components for this operating system”
Is the selection correct [ 1=Yes, 2=No ; default is “1” ] ? 1
The following products are available for installation:
1) Monitoring Agent for Tivoli Netcool/OMNIbus V07.40.00.00
2) all of the above
Type the numbers that correspond to the products that you want to install. Type “b” to change operating system, or type “q” to quit selection.
If you enter more than one number, separate the numbers by a comma or a space.
Type your selections here: 1
The following products will be installed:
Monitoring Agent for Tivoli Netcool/OMNIbus V07.40.00.00
Are your selections correct [ 1=Yes, 2=No ; default is “1” ] ? 1
Do you want to check prerequisites for the above components? [ 1=Yes, 2=No ; default is “1” ] ? 1
Running Prerequisite Scanner.
This may take a few minutes depending on the number of components being checked and the machine’s performance.
Prerequisite Scanner results for the selected components:
NOT AVAILABLE Monitoring Agent for Tivoli Netcool/OMNIbus /app/IBM/ITM/logs/prereqscan/20150126-113643/COMMON/result.txt
NOT AVAILABLE Tivoli Enterprise-supplied JRE /app/IBM/ITM/logs/prereqscan/20150126-113643/COMMON/result.txt
NOT AVAILABLE IBM Tivoli Monitoring Shared Libraries /app/IBM/ITM/logs/prereqscan/20150126-113643/COMMON/result.txt
NOT AVAILABLE IBM GSKit Security Interface /app/IBM/ITM/logs/prereqscan/20150126-113643/COMMON/result.txt
PASS Prerequisite Scanner Overall Result /app/IBM/ITM/logs/prereqscan/20150126-113643/COMMON/result.txt
Do you want to continue with the installation [ 1=Yes, 2=No ; default is “1” ] ? 1
… installing “Monitoring Agent for Tivoli Netcool/OMNIbus V07.40.00.00 for Linux x86_64 R2.6, R3.0 (64 bit)”; please wait.
=> installed “Monitoring Agent for Tivoli Netcool/OMNIbus V07.40.00.00 for Linux x86_64 R2.6, R3.0 (64 bit)”.
… Initializing component Monitoring Agent for Tivoli Netcool/OMNIbus V07.40.00.00 for Linux x86_64 R2.6, R3.0 (64 bit).
… Monitoring Agent for Tivoli Netcool/OMNIbus V07.40.00.00 for Linux x86_64 R2.6, R3.0 (64 bit) initialized.
Do you want to install additional products or product support packages [ 1=Yes, 2=No ; default is “2” ] ?
… postprocessing; please wait.
… finished postprocessing.
Installation step complete.
As a reminder, you should install product support on each of your TEM servers for any agents you have just installed.
This is done via the “/app/IBM/ITM/bin/itmcmd support” command on your TEM servers.
You may now configure any locally installed IBM Tivoli Monitoring product via the “/app/IBM/ITM/bin/itmcmd config” command.
insserv: warning: current start runlevel(s) (3 5) of script `vboxadd-x11′ overwrites defaults (empty).
insserv: Service network is missed in the runlevels 4 to use service ctrmc
insserv: Service syslog is missed in the runlevels 4 to use service ctrmc
Processing. Please wait…
Starting Monitoring Agent for Linux OS ..
To complete the agent installation the itm_os.sql file will have to be run by omnibus to apply the necessary modifications on the Omnibus database. In our case this file was located in:
/app/IBM/ITM/lx8266/no/bin
So we executed the following command:
HUOMNIBUS001-P1:/app/IBM/ITM/lx8266/no/bin # /app/IBM/tivoli/netcool/omnibus/bin/nco_sql -user root -S NCOMS -P ****** < /app/IBM/ITM/lx8266/no/bin/itm_os.sql
(0 rows affected)
(0 rows affected)
(0 rows affected)
(0 rows affected)
(0 rows affected)
(0 rows affected)
(0 rows affected)
(0 rows affected)
(0 rows affected)
(0 rows affected)
(0 rows affected)
(0 rows affected)
(0 rows affected)
(0 rows affected)
(0 rows affected)
(0 rows affected)
(0 rows affected)
(0 rows affected)
(0 rows affected)
(0 rows affected)
(0 rows affected)
(0 rows affected)
(0 rows affected)
(0 rows affected)
(0 rows affected)
(0 rows affected)
(0 rows affected)
(0 rows affected)
(0 rows affected)
(0 rows affected)
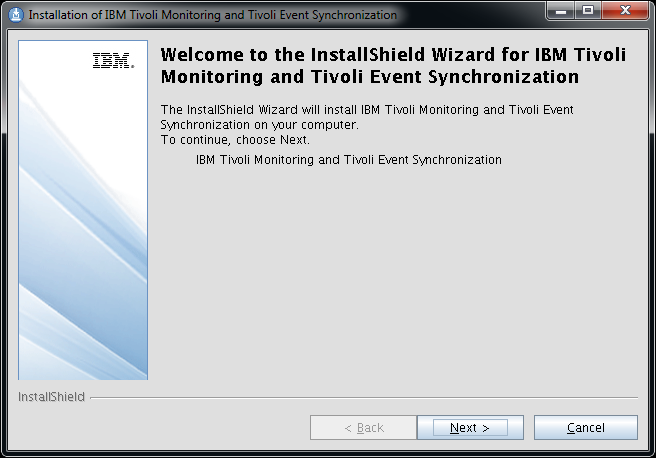
Configuring the IBM Tivoli Monitoring Agent for Netcool/Omnibus 8.1.
Start the Manage Tivoli Enterprise Monitoring services console on the Omnibus server using the $CANDLEDIR/bin/itmcmd manage & command then right click on Tivoli Monitoring Agent for Netcool/Omnibus and select Configure from the drop down menu.
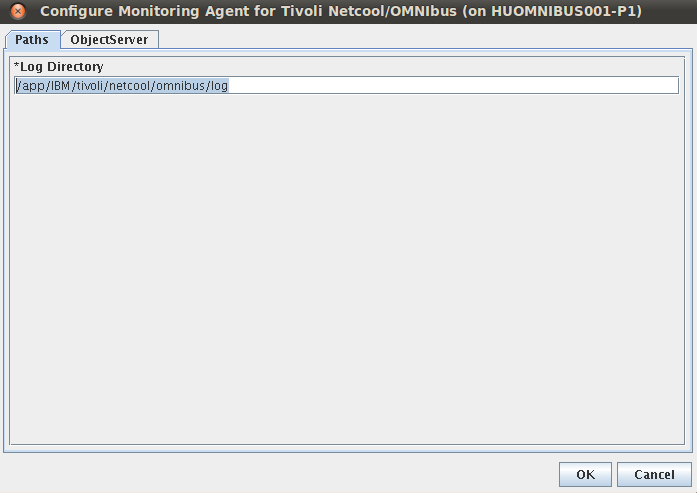
 Specify the log directory of the installed Netcool Omnibus 8.1 Server.
 Then specify the name of the running objectserver. We used the default objectserver name which is NCOMS. Click OK to continute to the second configuration step.
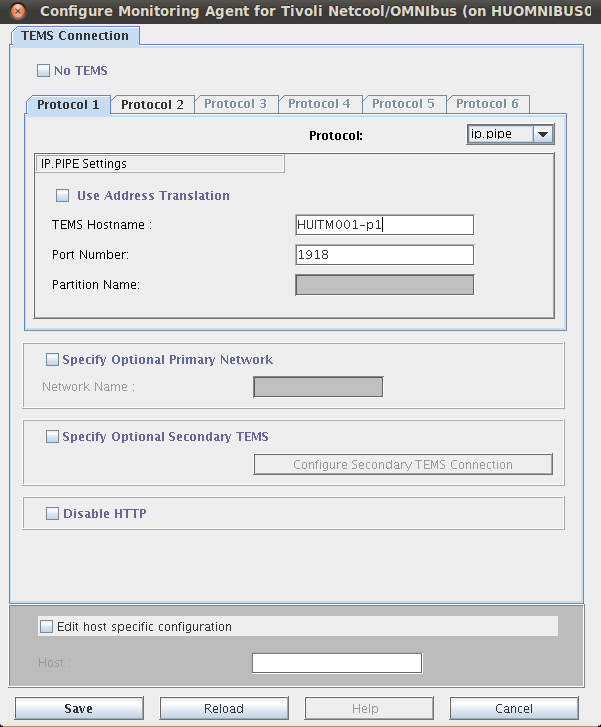
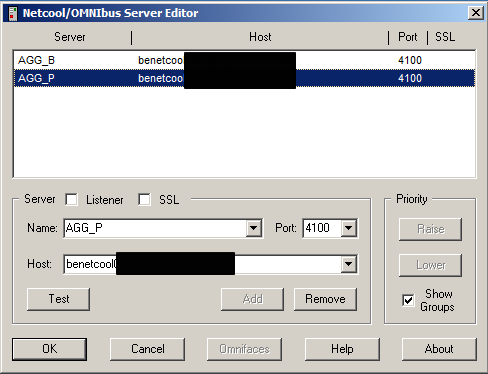
 Specify the name of the TEMS or RTEMS where you want to get your agent connected to, then click save.
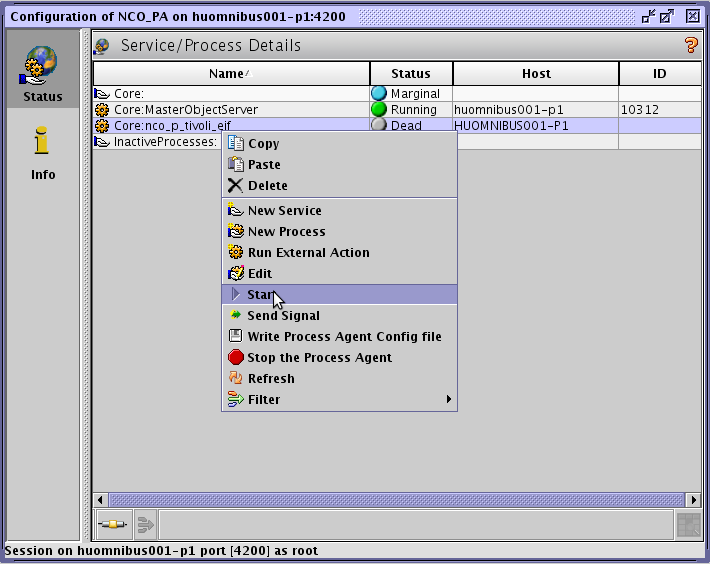
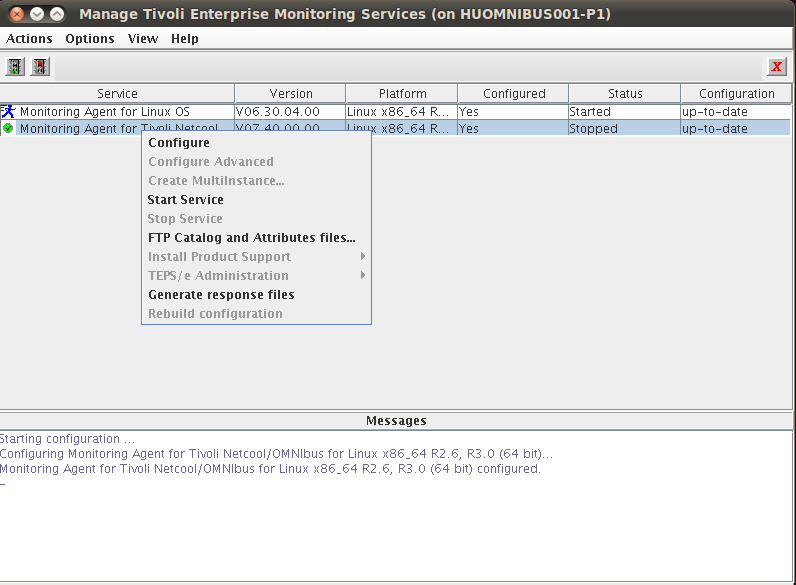
Right click on the monitoring agent, then select Start Service to start the monitoring agent.
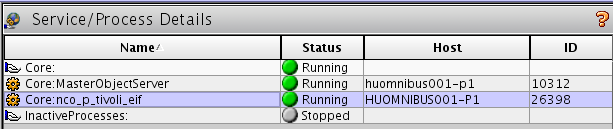
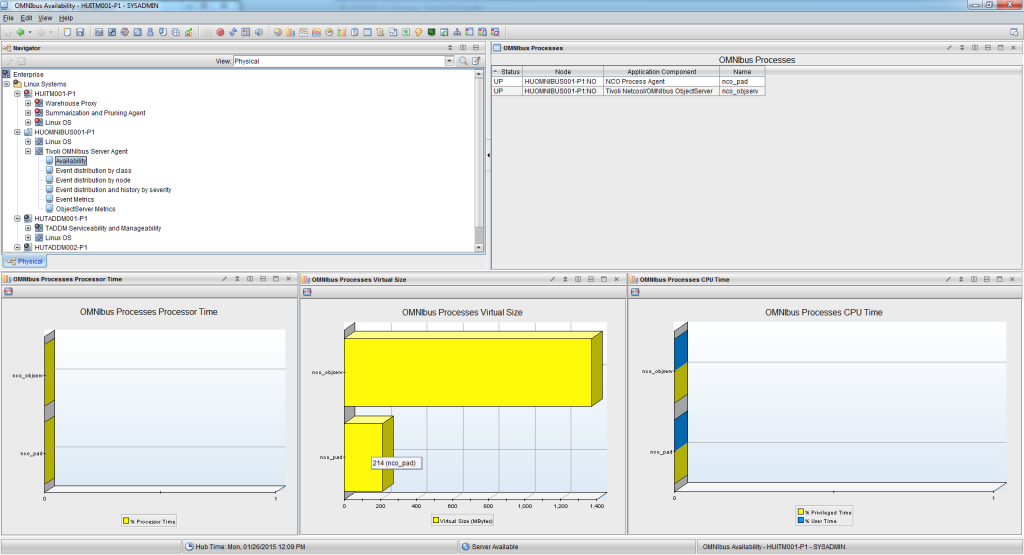
 After a few seconds the agent should be popping up on your TEPS console like this:
 Click OK to continue the installation.
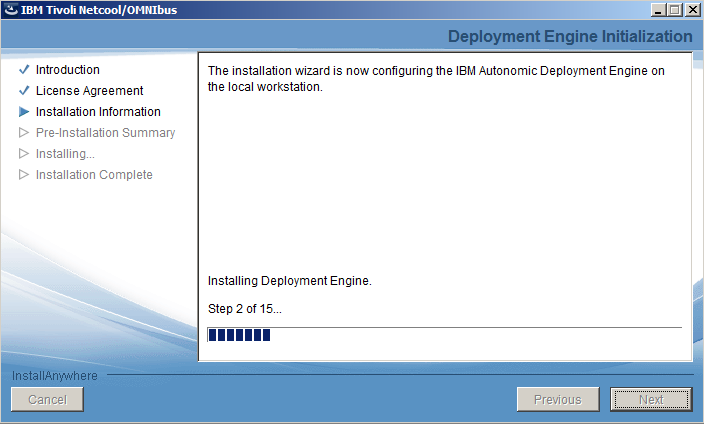 Accept the license agreement then click Next to start the configuration of the Autonomic Deployment Engine.
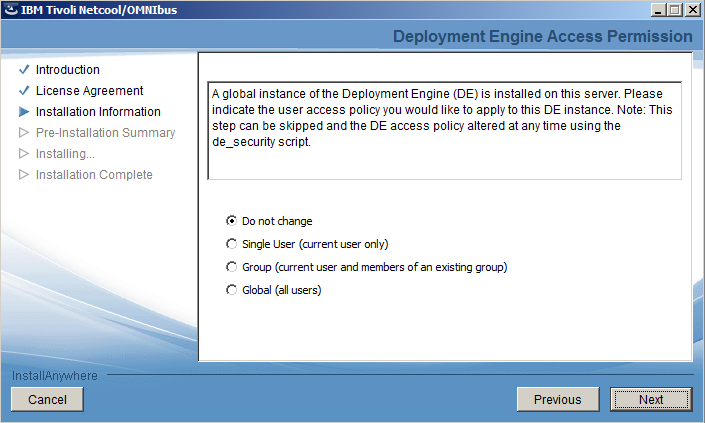 Select Do not change at the Deployment Engine Access Permission windows and click Next to continue the installation.
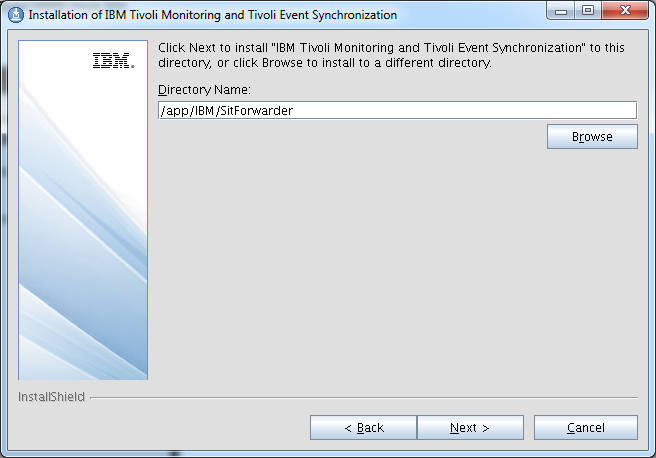
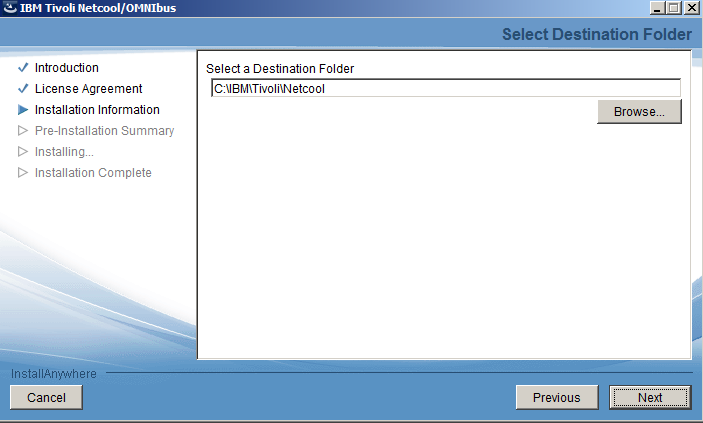 Select the Destination Folder and click Next to continue. We used the default folder offered.
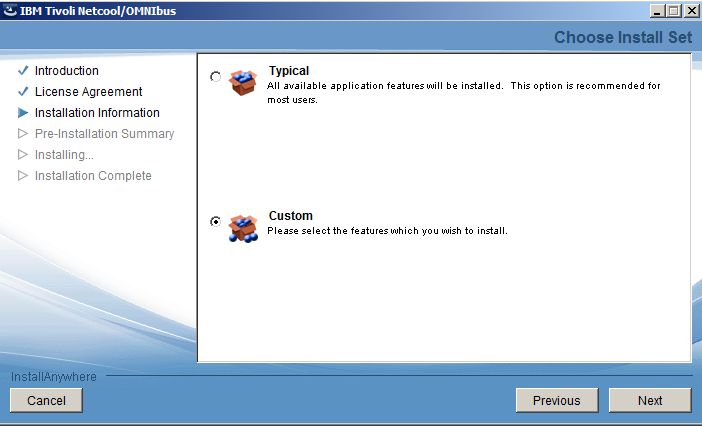 Select Custom at the Install Set selection and click Next.
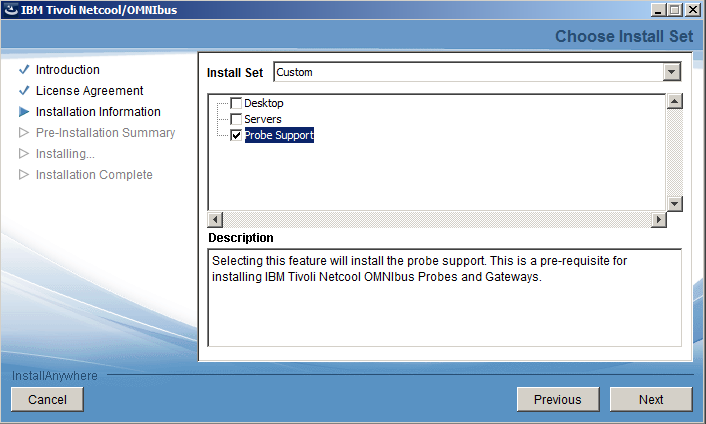 Select Probe Support only and continue the installation by clicking the Next button.
 Click Install to kick off the installation procedure.
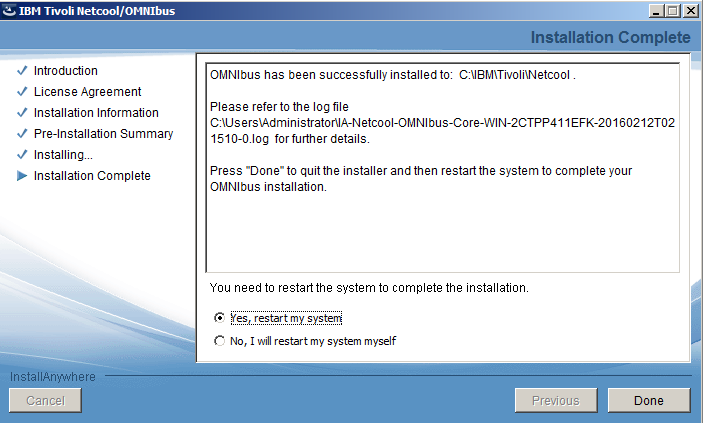 Reboot your windows system to finalize the installation.
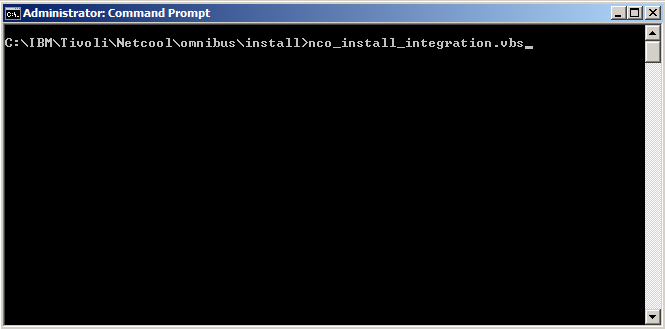 Start the nco_install_integration.vbs located in C:\IBM\Tivoli\Netcool\omnibus\install if you used the default omnibus installation folder.
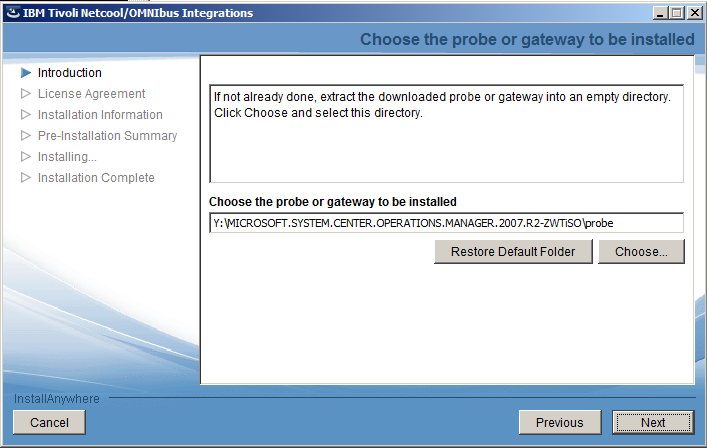 Locate the directory where you unpacked the probe file. You need to specify the directory that contains the COI directory then click Next.
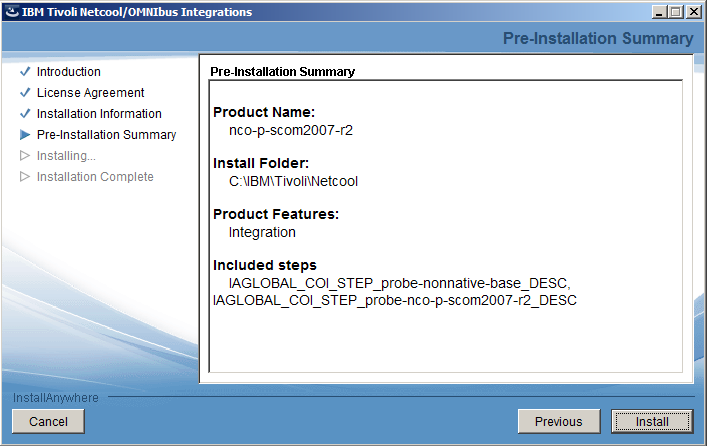 Accept the License Agreement at the next screen then click Install to start the installation of the SCOM probe.
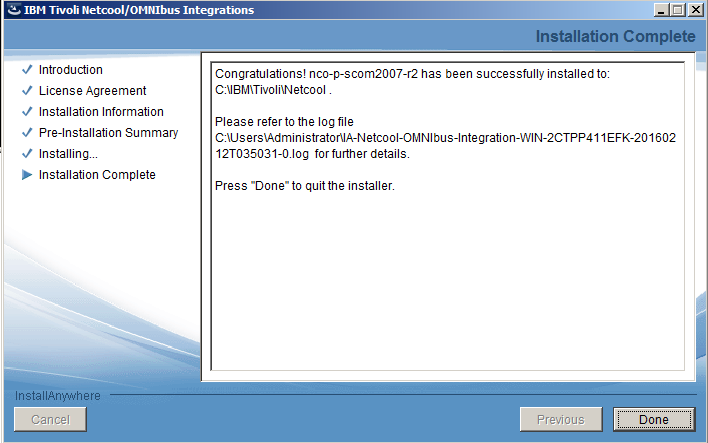 The installation of the SCOM probe is now complete.
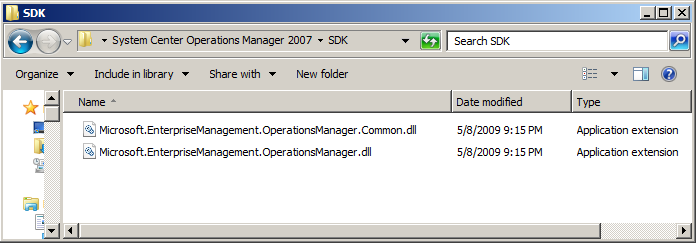 The next step is to move the SCOM SDK files from the SCOM Server to the probe machine. You will need to have the copy the following files in the following directories:
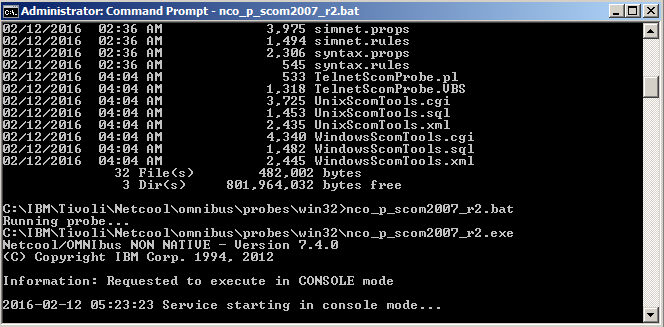 Now you should start the probe with the following command: C:\IBM\Tivoli\Netcool\omnibus\probes\win32\nco_p_scom2007_r2.exe If the probe stays running that means it has successfully connected to both the Object server and the SCOM 2007 Server.
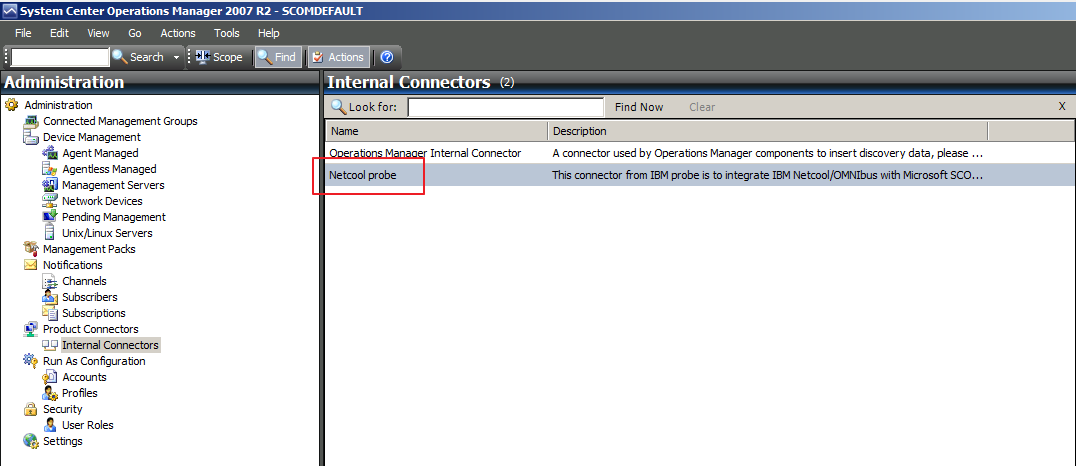 Once the probe connects to the SCOM server successfully it will create the Netcool Probe product connector.
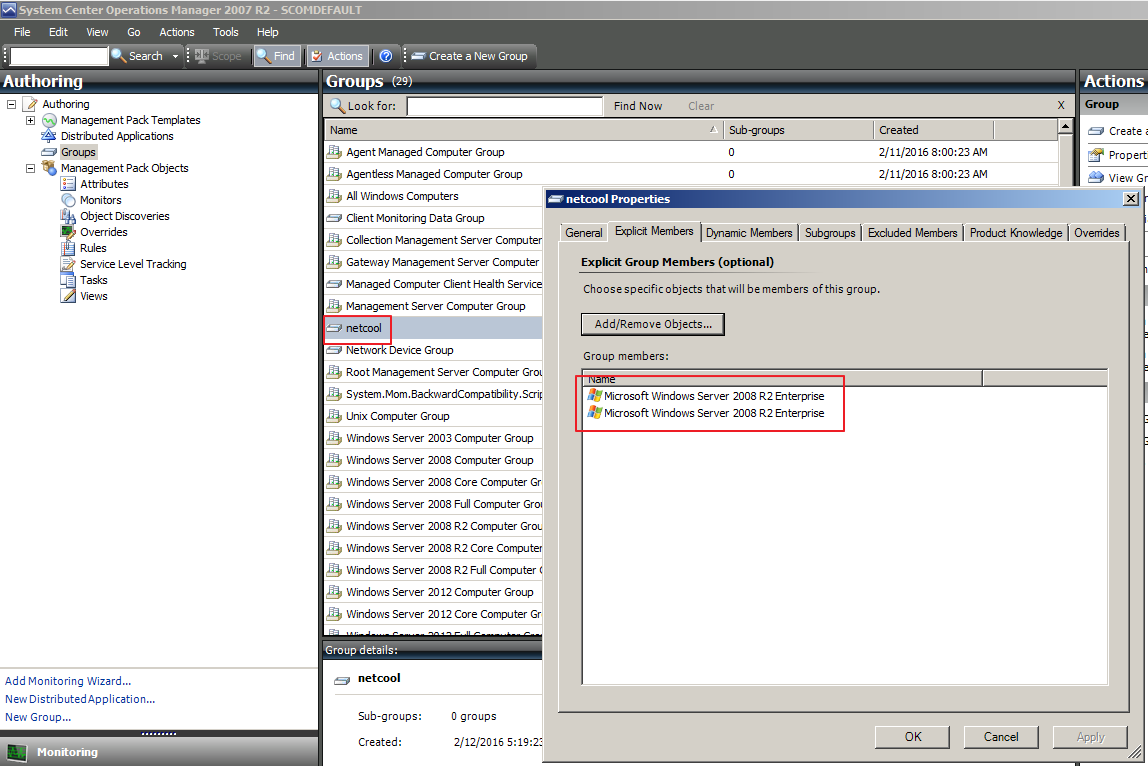 We set up a group called netcool and assigned 2 Windows 2008 servers to it.
 If you need to filter on what nodes or events should hit the Probe, you can do so by setting up a groups and assigning them to the Netcool probe connector. Click on the Add button.
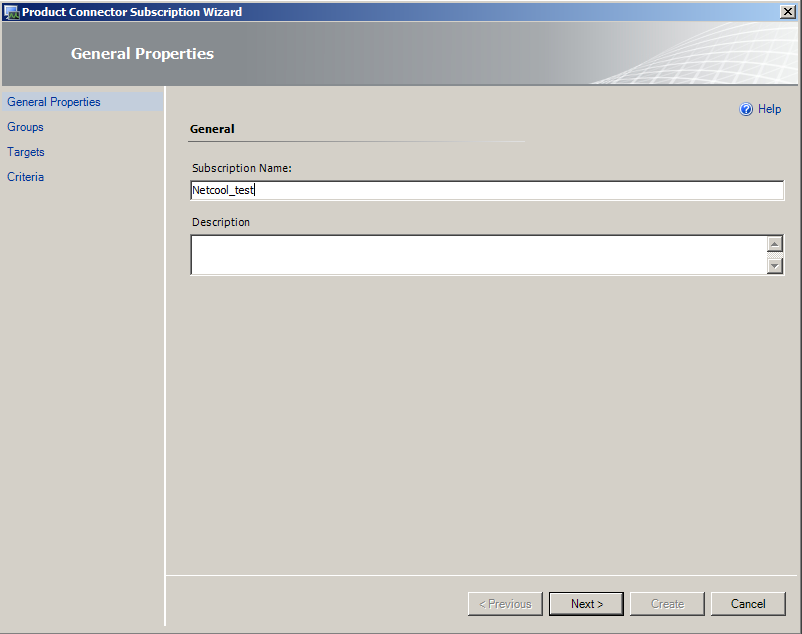 Assign a name to the Subscription then click Next.
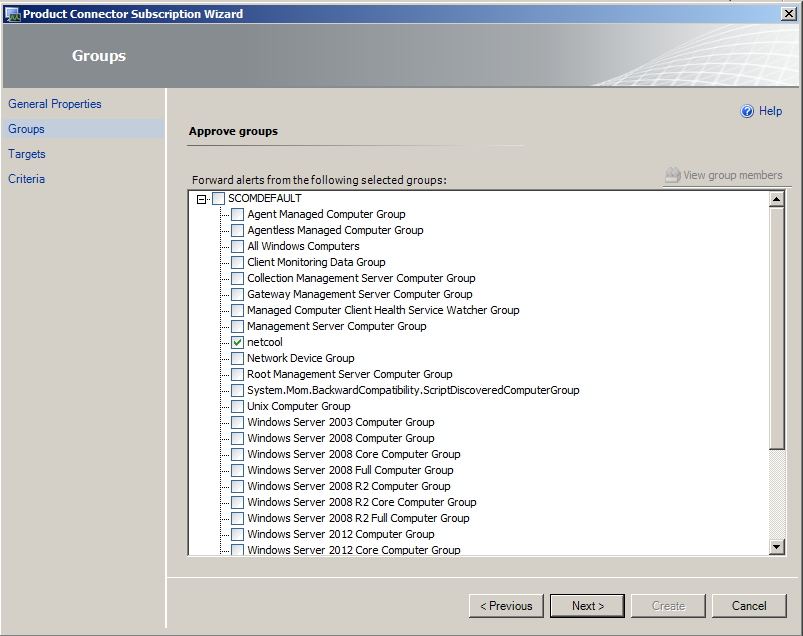 Select “netcool” from the groups list then click Next.
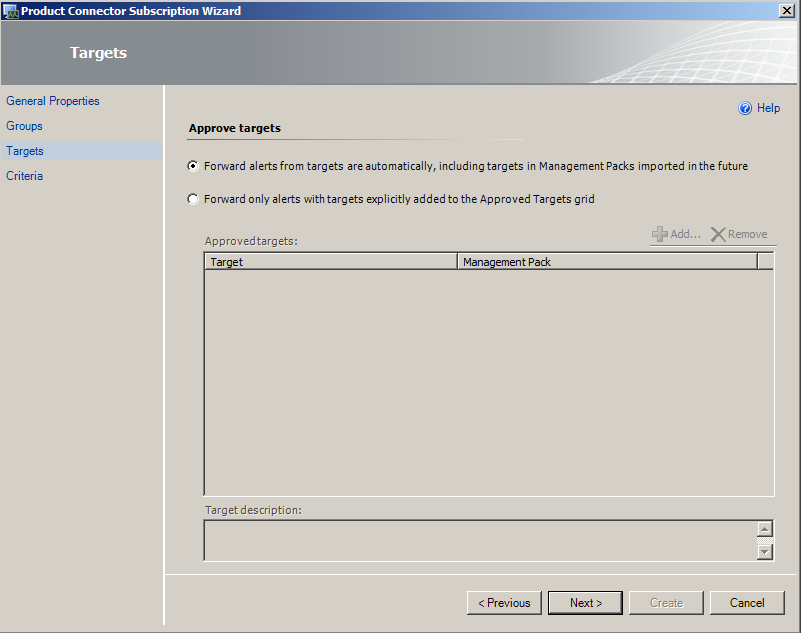 Leave the default option at the approve targets screen and click Next.
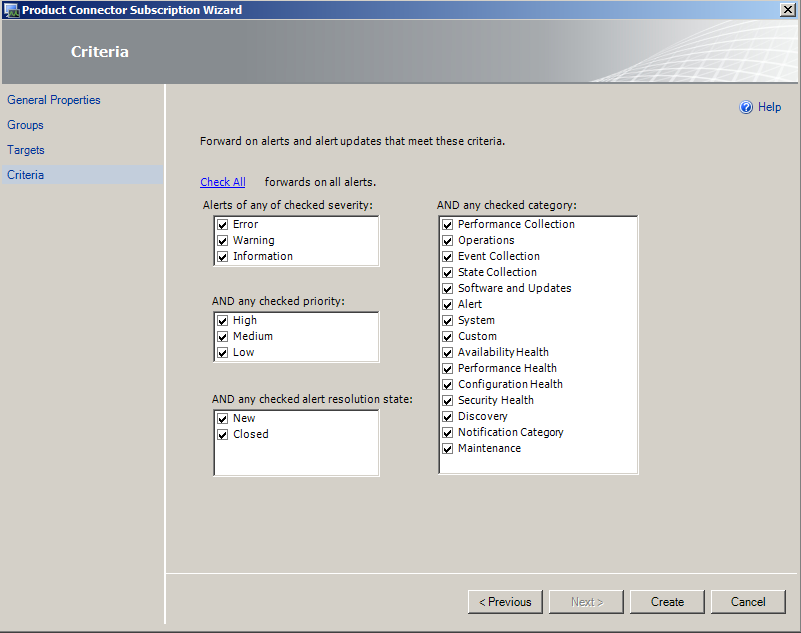 Select the desired items you would like to have alerts raised for and click Create.
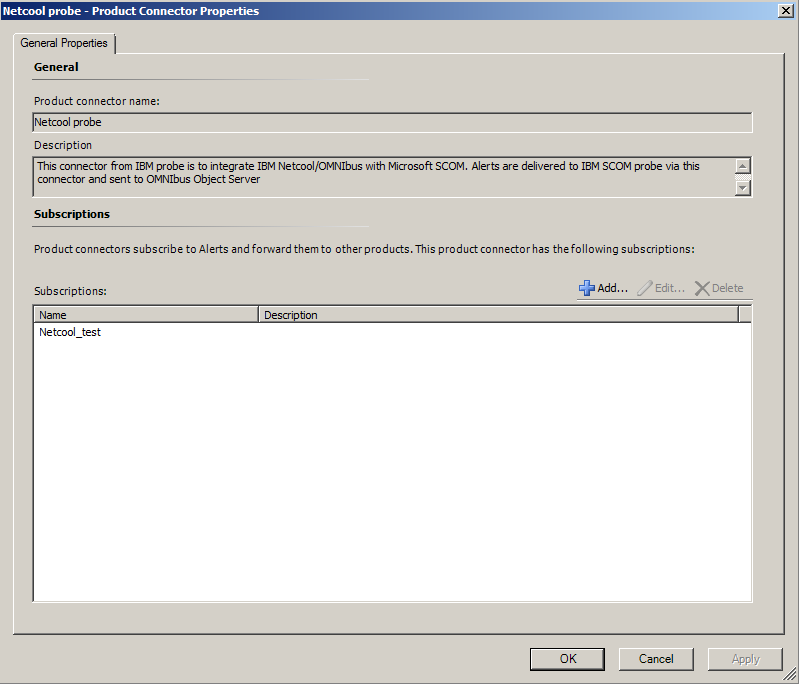 The subscription is now created and the events should start flowing across to Omnibus.