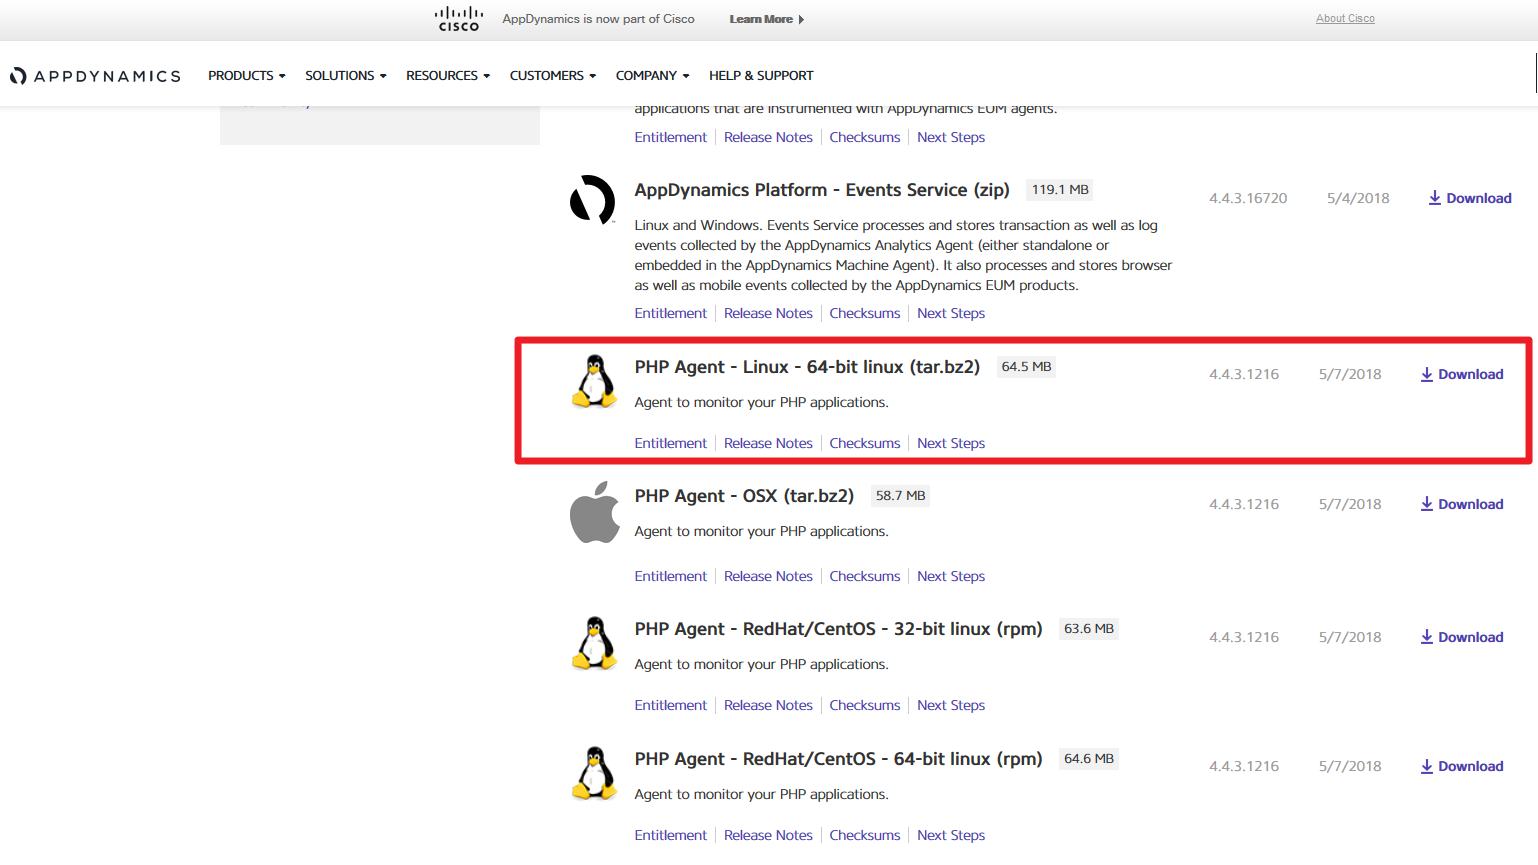
The first step is to install the Appdynamics PHP Agent which will monitor the internals of PHP on this Ubuntu Server. We have downloaded the agent from https://downloads.appdynamics.com.
 This agent has no pre-defined configuration file included so we need to do the installation and configuration manually. Upload the agent and unpack it into a desired location.
root@HUAPPD001-P1:/app/appdynamics/phpagent# bzip2 -d appdynamics-php-agent-x64-linux-4.4.3.1216.tar.bz2
root@HUAPPD001-P1:/app/appdynamics/phpagent# tar xvf appdynamics-php-agent-x64-linux-4.4.3.1216.tar
root@HUAPPD001-P1:/app/appdynamics/phpagent/appdynamics-php-agent-linux_x64# mv * /app/appdynamics/phpagent/
root@HUAPPD001-P1:/app/appdynamics/phpagent/appdynamics-php-agent-linux_x64# cd ..
root@HUAPPD001-P1:/app/appdynamics/phpagent# rm -rf appdynamics-php-agent-linux_x64
root@HUAPPD001-P1:/app/appdynamics/phpagent# ls -ltr
total 64
-rw-r--r-- 1 root root 2343 máj 5 02:50 Install.txt
drwxrwxr-x 9 root root 4096 máj 5 03:00 proxy
-rw-r--r-- 1 root root 5062 máj 5 03:00 phpcheck.sh
drwxrwxr-x 4 root root 4096 máj 5 03:00 php
drwxrwxrwx 2 root root 4096 máj 5 03:00 logs
-rw-rw-r-- 1 root root 35 máj 5 03:00 LICENSE.txt
-rwxrwxr-x 1 root root 30113 máj 5 03:00 install.sh
-rw-r--r-- 1 root root 305 máj 5 03:00 appdynamics_api_header.php
To install the application we will have to call the install.sh command. This command will perform the following:
- Copy appdynamics_agent.so to the php extension library. This extension is called automatically anytime a php page is invoked.
- Copy the appdynamics_agent.ini to the same directory where the php.ini resides
- Configure the controller-info.xml file.
- Creates the runProxy executable to start the agent.
The following parameters are mandatory – in this order – for the install.sh:
- -a account-name@account-access-key which is your unique name and key assigned to you by appdynamics.
- controller’s hostname ( make sure host is resolvable and you can connect to the controller’s connection port.
- controller’s port
- Application’s name ( Appdynamics application you want the agent to report to )
- Application tier ( The tier inside the application, it doesn’t have to be pre-created )
- Application node ( The node belonging to the tier, it doesn’t have to be pre-created )
The full syntax looks like this:
./install.sh -a=account-name@account-access-key hostname-of-controller 8090 WordPress_Test_Environment WordPress_Server_Php wp-server
Install script for AppDynamics PHP Agent 4.4.3.0GA.5b071fef580bca60d0ed12ddb96d7be8864f342c
Found PHP installation in /usr/bin

Detected PHP Version:
 PHP 7.0.30-0ubuntu0.16.04.1 (cli) ( NTS )
Copyright (c) 1997-2017 The PHP Group
Zend Engine v3.0.0, Copyright (c) 1998-2017 Zend Technologies
 with Zend OPcache v7.0.30-0ubuntu0.16.04.1, Copyright (c) 1999-2017, by Zend Technologies

PHP version id: 7.0
PHP extensions directory: /usr/lib/php/20151012
PHP ini directory: /etc/php/7.0/cli/conf.d
Controller Host: hostname
Controller Port: 8090
Application Name: WordPress_Test_Environment
Tier Name: WordPress_Server_Php
Node Name: wp-server
Account Name: account-name
Access Key: access-key
SSL Enabled: false
HTTP Proxy Host:
HTTP Proxy Port:
HTTP Proxy User:
HTTP Proxy Password File:

Writing '/app/appdynamics/phpagent/php/conf/appdynamics_agent_log4cxx.xml'
Writing '/etc/php/7.0/cli/conf.d/appdynamics_agent.ini'
Writing '/app/appdynamics/phpagent/proxy/conf/controller-info.xml'
rm -f "/usr/lib/php/20151012/appdynamics_agent.so"
ln -s "/app/appdynamics/phpagent/php/modules/appdynamics_agent_php_7.0.so" "/usr/lib/php/20151012/appdynamics_agent.so"
Writing '/app/appdynamics/phpagent/proxy/
As you can see above the installer found most of the settings automatically and installed the agent. In our case the location of the php.ini was incorrect so we manually locate the php.ini files by executing:
find / -name php.ini
/etc/php/7.0/apache2/php.ini
/etc/php/7.0/cli/php.ini
We found 2 php.ini‘s on our system, one of them is responsible for the settings for the client run php scripts and the other one is responsible for the apache webserver run php processes. We want to monitor wordpress and mysql so we need to modify the apache one.
- Open /etc/php/7.0/cli/conf.d/appdynamics_agent.ini
- Copy all the settings in appdynamics_agent.ini to the end of the php.ini located in /etc/php/7.0/apache2/
- Restart the apache2 server: service apache2 restart
Now we need to generate some traffic for the appdynamics controller. We have created a load plan with the Paessler Web Server Stress Tool and started loading the website heavily.
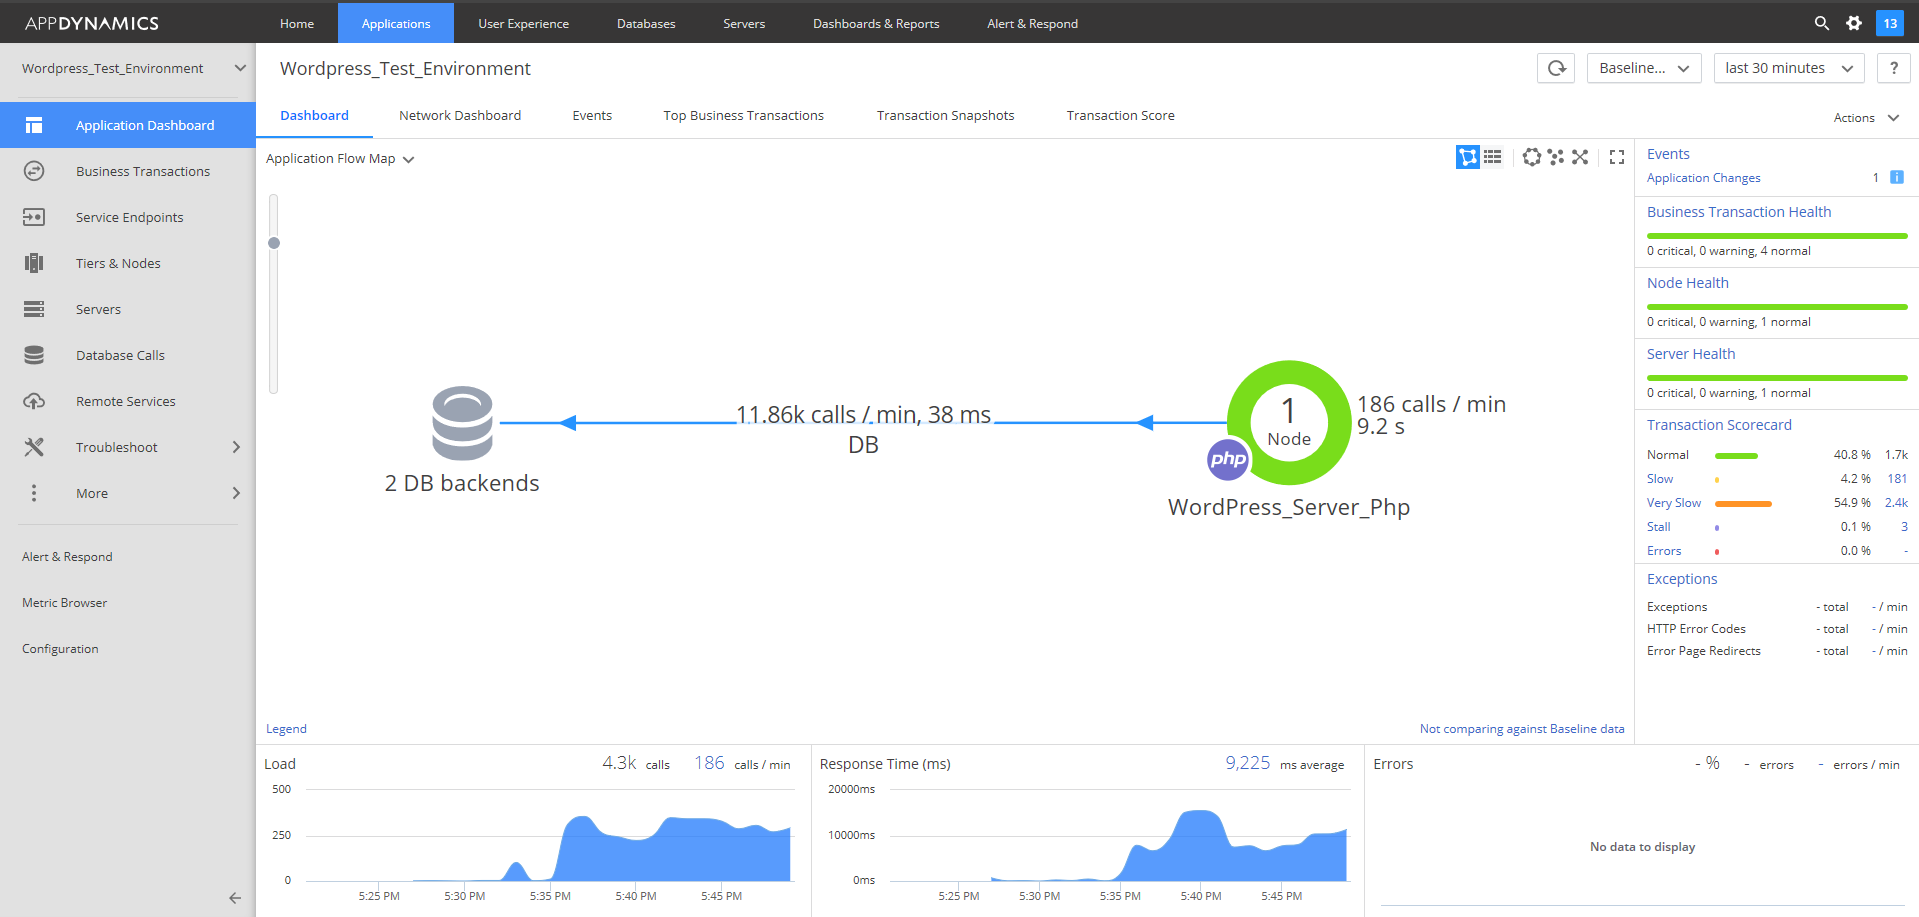
 In a few minutes data starts flowing into the appdynamics application dashboard.
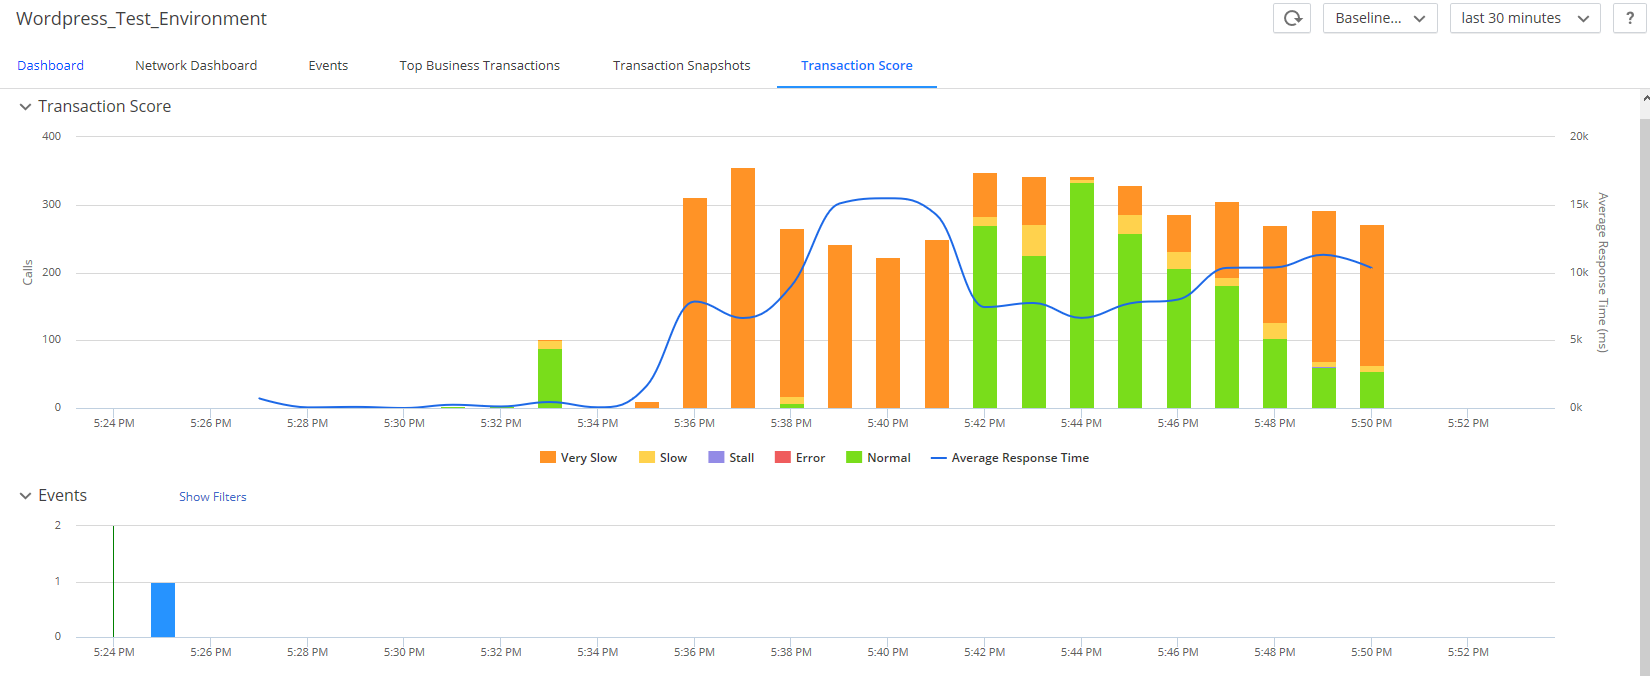
 Transactions also show up in the other views.
 Database calls are automatically detected and queries are displayed.
