In certain customer environments only windows based servers are allowed on the network. Previously this was a showstopper for zabbix proxy and server implementations. Fortunately with the new windows architectures there is a way to install Zabbix Server or Zabbix Proxy on windows.
In this walkthrough we will install the Zabbix proxy on windows server 2019. Windows Server 2019 and Windows 10 comes with the WSL option which stands for Windows Subsystem for Linux.
Windows Subsystem for Linux (WSL) is a new Windows 10/Windows Server 2019 feature that enables you to run native Linux command-line tools directly on Windows, alongside your traditional Windows desktop and modern store apps.
There are multiple options available for Linux distributions in WSL. We will however pick ubuntu server 18.4 for our demonstration.
First we will need to enable the WLS option on Windows Server 2019 by executing the following command in powershell. Don’t forget to open powershell as administrator.
Enable-WindowsOptionalFeature -Online -FeatureName Microsoft-Windows-Subsystem-Linux

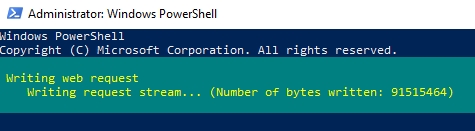
Reboot to server to enable the WSL feature. The next step is to download the relevant ubuntu WSL image using the following command:
Invoke-WebRequest -Uri https://aka.ms/wsl-ubuntu-1804 -OutFile Ubuntu.appx -UseBasicParsing
This will download the latest ubuntu 18.04 WSL image.
Once the image is downloaded we created the ubuntu directory and extracted the image file.
PS C:\Users\Administrator> mkdir \ubuntu
PS C:\Users\Administrator> mv Ubuntu.appx Ubuntu.zip
PS C:\Users\Administrator> Expand-Archive Ubuntu.zip c:\ubuntu
PS C:\Users\Administrator> cd \Ubuntu
PS C:\ubuntu> dir
Mode                LastWriteTime         Length Name

----                -------------         ------ ----
d-----         5/8/2019   1:35 AM                AppxMetadata
d-----         5/8/2019   1:35 AM                Assets
-a----        8/17/2018   3:15 AM         212438 AppxBlockMap.xml
-a----        8/17/2018   3:15 AM           3835 AppxManifest.xml
-a----        8/17/2018   3:17 AM          11112 AppxSignature.p7x
-a----        8/17/2018   3:15 AM      223983209 install.tar.gz
-a----        8/17/2018   3:15 AM           5400 resources.pri
-a----         5/8/2019   1:30 AM      224629284 Ubuntu.zip
-a----        8/17/2018   3:15 AM         211968 ubuntu1804.exe
-a----        8/17/2018   3:15 AM            744 [Content_Types].xml
Set the user environment variables by executing the following command:
$userenv = System.Environment::GetEnvironmentVariable("Path", "User")
[System.Environment]::SetEnvironmentVariable("PATH", $userenv + "C:\ubuntu", "User")
Install the ubuntu instance by executing ubuntu1804.exe from c:\ubuntu. As part of the installation we defined our first ubuntu user as seen below. Once the session is open you can start using your ubuntu instance right away. The ubuntu session will look like a powershell window which is pretty cool. It will be using the same hostname, memory, disks, etc as the windows host. You basically have access to every resource the windows OS has but you are still running a full featured ubuntu server.
PS C:\ubuntu> .\ubuntu1804.exe
Installing, this may take a few minutes…
Please create a default UNIX user account. The username does not need to match your Windows username.
For more information visit: https://aka.ms/wslusers
Enter new UNIX username: user
Enter new UNIX password:
Retype new UNIX password:
passwd: password updated successfully
Installation successful!
To run a command as administrator (user "root"), use "sudo ".
See "man sudo_root" for details.

user@WIN-72UH30KQAK4:~$ sudo su -
 [sudo] password for user:
 root@WIN-72UH30KQAK4:~#
We defined the zabbix repo that matches our distribution. We install zabbix 4.0 LTS in this example.
wget https://repo.zabbix.com/zabbix/4.0/ubuntu/pool/main/z/zabbix-release/zabbix-release_4.0-2+bionic_all.deb
dpkg -i zabbix-release_4.0-2+bionic_all.deb
apt update
apt upgrade
After the ubuntu system is on the latest software level we install the zabbix proxy. We used the MySQL based zabbix proxy installation which will install mariadb as part of the proxy installation.
apt install zabbix-proxy-mysql
Once the proxy is installed we create the zabbix database and user with the following commands.
mysql -u root
create database zabbix character set utf8 collate utf8_bin;
grant all privileges on zabbix.* to 'zabbix'@'localhost' identified by 'yourpassword';
quit;
We now create the database schemas for the Zabbix Proxy.
zcat /usr/share/doc/zabbix-proxy-mysql/schema.sql.gz | mysql -uzabbix -p [yourpassword]
The next step is to edit the /etc/zabbix/zabbix_proxy.conf file with your parameters. We use an encrypted active connection between the zabbix proxy and the zabbix server. Hence we also use certificates in the configuration file.
We added the database connection settings to the configuration file:
DBHost=localhost
DBName=zabbix
DBUser=zabbix
DBPassword=<yourpassword>
We are not going to go into detail on how to set up the rest of the proxy configuration file. Please follow the official instructions to set up your own configuration parameters in the configuration file.
Before we can start the zabbix proxy we need to create the proxy on the zabbix console. Open your zabbix frontend and go to Administration->Proxies and click “Create proxy” on the upper right corner.
We filled in the hostname of the zabbix proxy and picked the relevant Encryption level checkbox. We used “Cerfiticate”.
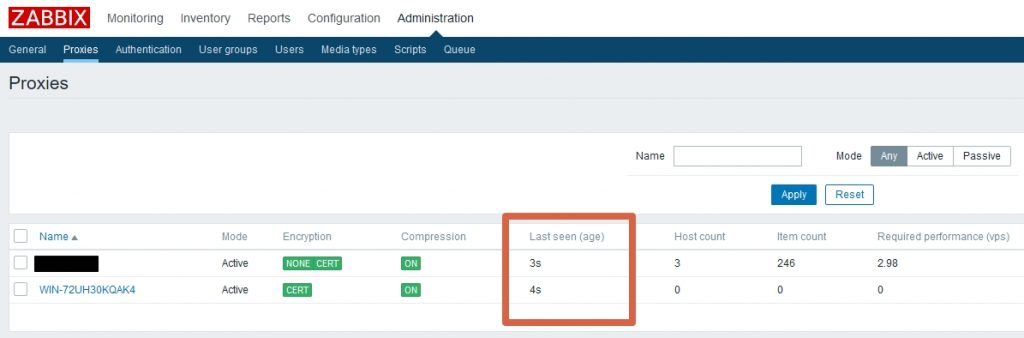
If all goes well you will see your new proxy connected like this on the zabbix console.
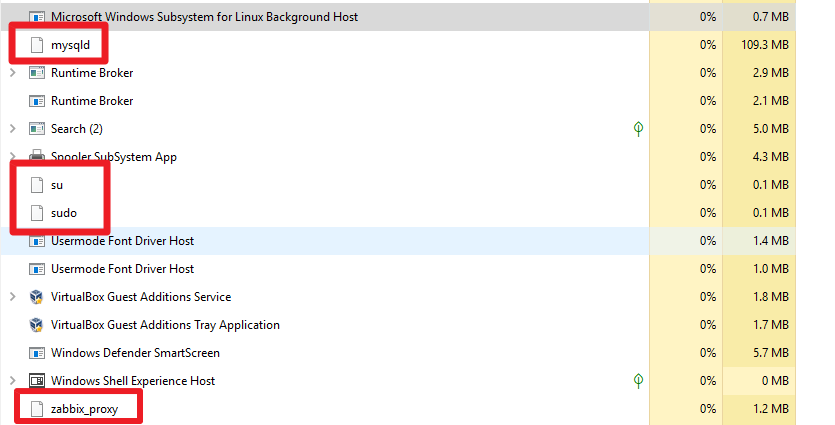
the resource usage of the mysqld, zabbix-proxy and ubuntu processes show up in the windows task manager like a normal windows process.
Whenever we need to interact with the ubuntu server we can open a session using the following icon on taskbar. The server keeps running regardless these sessions are open or closed.

If you have windows firewall enabled on your server, make sure that your proxy port is open across so agents can connect to it.
The next and last step we had to do is to make sure that the mysql and zabbix-proxy service starts when the windows server is rebooted. By default ubuntu init.d services are not respected so we had to do the following:
Add the following lines to the /etc/sudoers file on ubuntu:
%sudo   ALL=(ALL) NOPASSWD: /usr/sbin/service zabbix-proxy *
%sudo   ALL=(ALL) NOPASSWD: /usr/sbin/service mysql *
Create startservices.sh on ubuntu with the following content:
!/bin/bash
sudo service mysql start
sudo service zabbix-proxy start
Cretate autostart.vbs on the windows server with the following content.
Set WshShell = CreateObject("WScript.Shell")
WshShell.Run "C:\Windows\System32\bash.exe -c /app/startservices.sh",0
Set WshShell = Nothing
Schedule this script to run at start up.
The user environment variables should be set by executing the following command:
$userenv = [System.Environment]::GetEnvironmentVariable(“Path”, “User”)
[System.Environment]::SetEnvironmentVariable(“PATH”, $userenv + “C:\Ubuntu”, “User”)
You forgot the [ ].
Nonetheless, Great tutorial.
Hi,
thanks for the guide.
I have stucked here:
$userenv = System.Environment::GetEnvironmentVariable(“Path”, “User”)
[System.Environment]::SetEnvironmentVariable(“PATH”, $userenv + “C:\ubuntu”, “User”)
System.Environment::GetEnvironmentVariable : The term ‘System.Environment::GetEnvironmentVariable’ is not recognized as the name of a cmdlet, function, script file, or operable program.
Have you got any idea, what have I done wrong?
Thank you,
Laszlo
Getting an error:
PS C:\Ubuntu> $userenv = System.Environment::GetEnvironmentVariable(“Path”, “User”)
System.Environment::GetEnvironmentVariable : The term ‘System.Environment::GetEnvironmentVariable’ is not recognized
as the name of a cmdlet, function, script file, or operable program. Check the spelling of the name, or if a path was
included, verify that the path is correct and try again.
At line:1 char:12
+ $userenv = System.Environment::GetEnvironmentVariable(“Path”, “User”)
+ ~~~~~~~~~~~~~~~~~~~~~~~~~~~~~~~~~~~~~~~~~~
+ CategoryInfo : ObjectNotFound: (System.Environm…ronmentVariable:String) [], CommandNotFoundException
+ FullyQualifiedErrorId : CommandNotFoundException
Not sure if you can help a poor fella out?
But getting the error above
Using: Win64 bit / Server 2019 Standard OS