Downloading and installing the Appdynamics Machine Agent
We have recently set up a test environment with a PHP/MySQL based test Ubuntu 16.04.4 server. We will now set up monitoring for Linux OS, PHP 7.0 and MySQL.
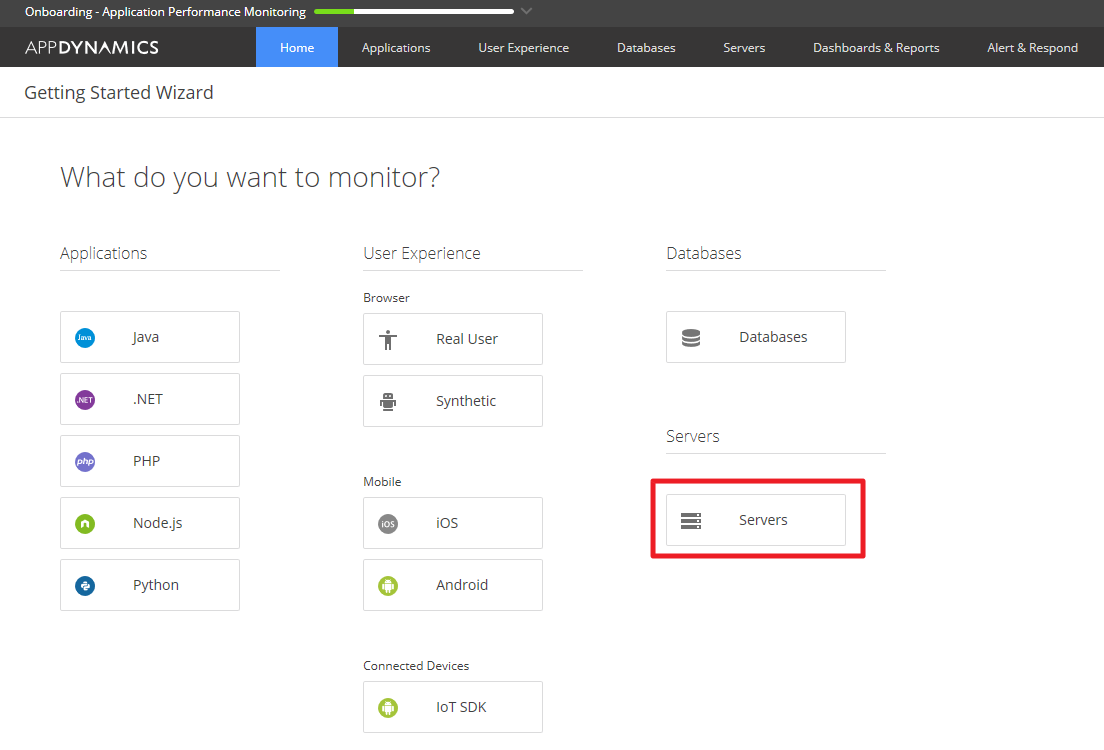
The first step is to install the PHP Agent the next step is to downloading the machine agent. Open your Appdynamics console and select the Getting Started Wizard.
 Then click the Server button on the What do you want to monitor? screen.
 At the next screen check if the connection details are correct then click the click here to download button to acquire the Machine Agent.
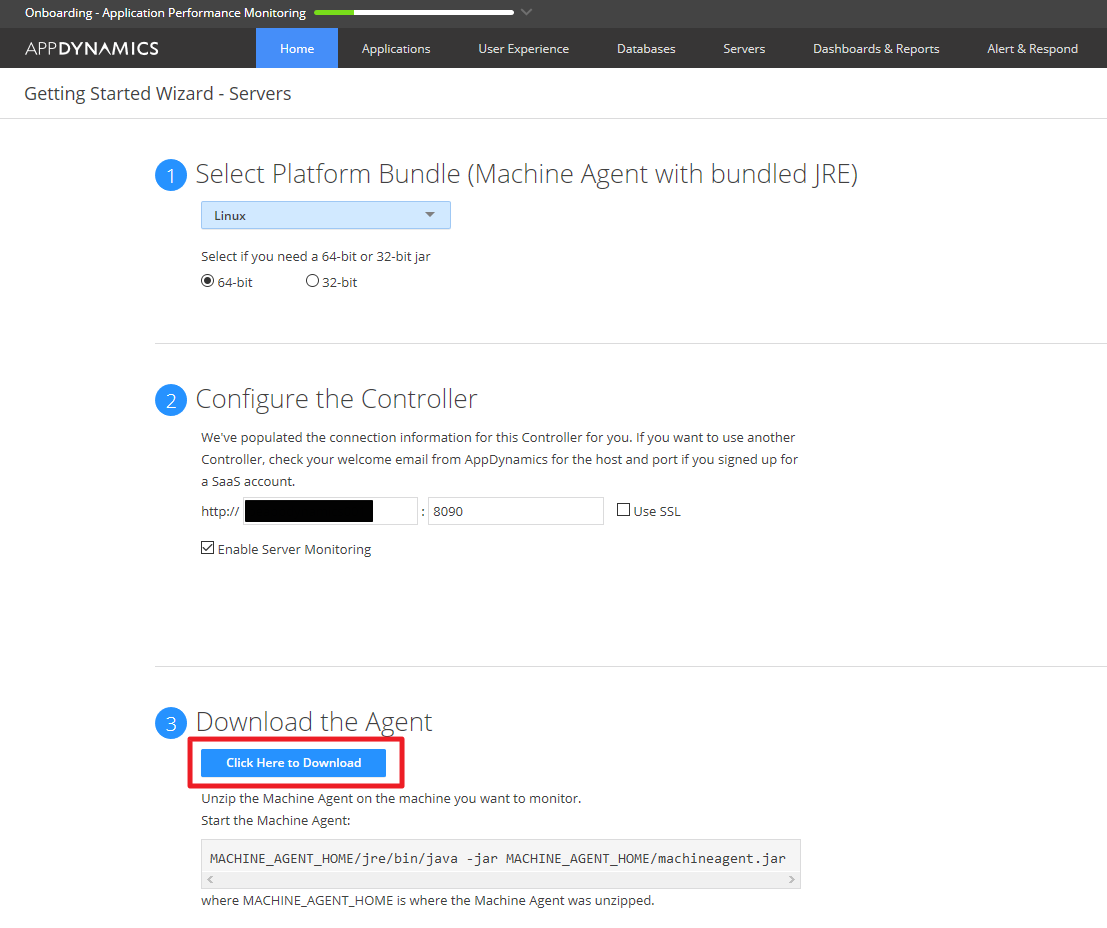 Upload the downloaded zip file to your ubuntu server, unpack it to a desired location. This is where you want to run the machine agent from.
Check if the hostname of the appdynamics server is resolvable by simply pinging it, and also check if you can telnet into the port defined in the Configure the Controller step ( above ). The Machine Agent zip should contain the configuration files pre-configured with all the connection details, so in this case we do not have to do this manually. Run the machine agent as root using the following command:
[Your-agent-director]/bin/machine-agent &
root@HUAPPD001-P1:/app/appdynamics/machineagent/bin# ./machine-agent
Using java executable at /app/appdynamics/machineagent/jre/bin/java
Using Java Version [1.8.0_111] for Agent
Using Agent Version [Machine Agent v4.4.3.1214 GA Build Date 2018-04-28 05:12:10]
[INFO] Agent logging directory set to: [/app/appdynamics/machineagent]
Machine Agent Install Directory :/app/appdynamics/machineagent
Machine Agent Temp Directory :/app/appdynamics/machineagent/tmp
Tasks Root Directory :/app/appdynamics/machineagent/controlchannel
[INFO] Agent logging directory set to: [/app/appdynamics/machineagent]
Redirecting all logging statements to the configured logger
15:05:30.460 [system-thread-0] DEBUG com.appdynamics.common.framework.util.EmbeddedModeSecurityManager - Installed
15:05:30.490 [system-thread-0] INFO com.appdynamics.analytics.agent.AnalyticsAgent - Starting analytics agent with arguments [-p, /app/appdynamics/machineagent/monitors/analytics-agent/conf/analytics-agent.properties, -yr, analytics-agent.yml]
Started AppDynamics Machine Agent Successfully.
Once the agent is started it should automatically show up on the appdynamics console in the servers section.
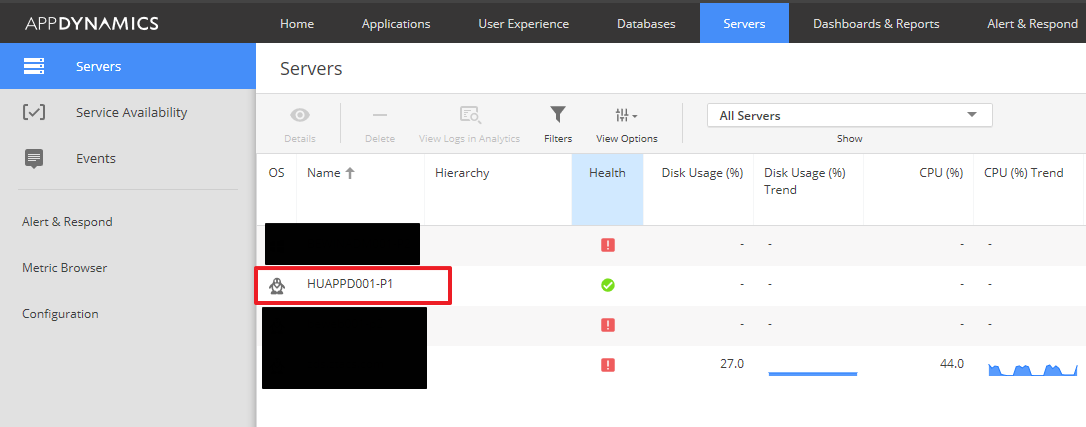 Click on the machine’s name to open the detailed OS monitoring dashboard.
 If you run into connection errors you can check and change the connection settings in the configuration file:
[Your-agent-director]/conf/controller-info.xml
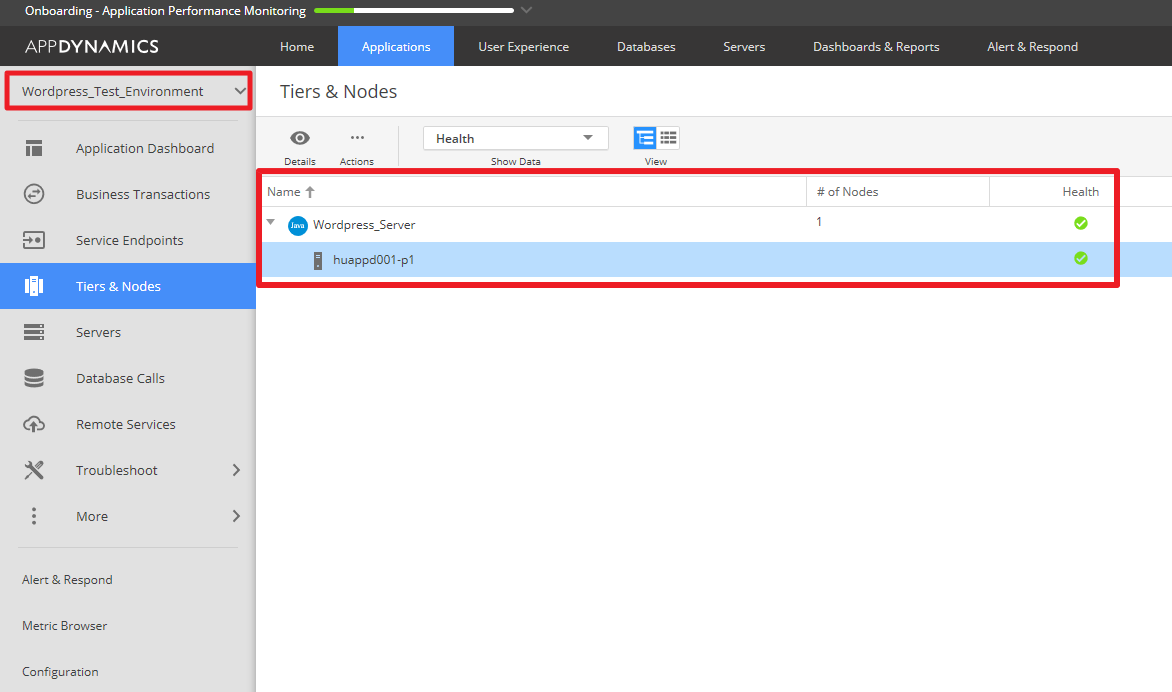
Assign the machine agent automatically to an application and to its tiers and nodes
If you only want to use the machine agent on this server, you can hard wire the Application, Tier and Node details in the contoller-info.xml. Please note that if you use for example the PHP Agent on the same box this might stop the PHP Agent to connect to the controller.
There is no need to create the tiers and nodes manually they will be created on the dashboard automatically. We only added the WordPress_Test_Environment Application before the agent assignment. You will need to add the following to the controller-info.xml configuration file:
<force-agent-registration>true</force-agent-registration>
<application-name>WordPress_Test_Environment</application-name>
<tier-name>WordPress_Server</tier-name>
<node-name>huappd001-p1</node-name>
Change the name of the application, tier and node according to your specifications and restart the agent. Once the agent is restarted navigate into the application and verify if the machine agent has been added successfully.
 Click Account Settings to and click Add set up a new customer account. You have to specify the account admin user, its password.
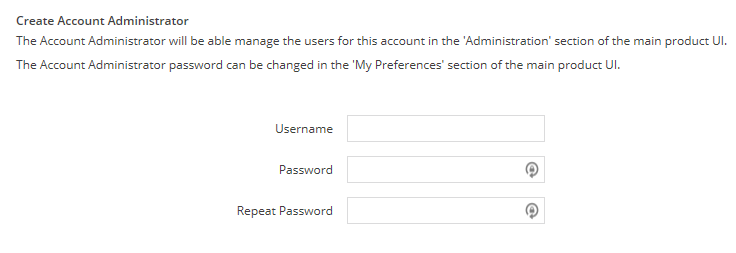 Also specify the number of licenses you want to use for this account and the account’s name.
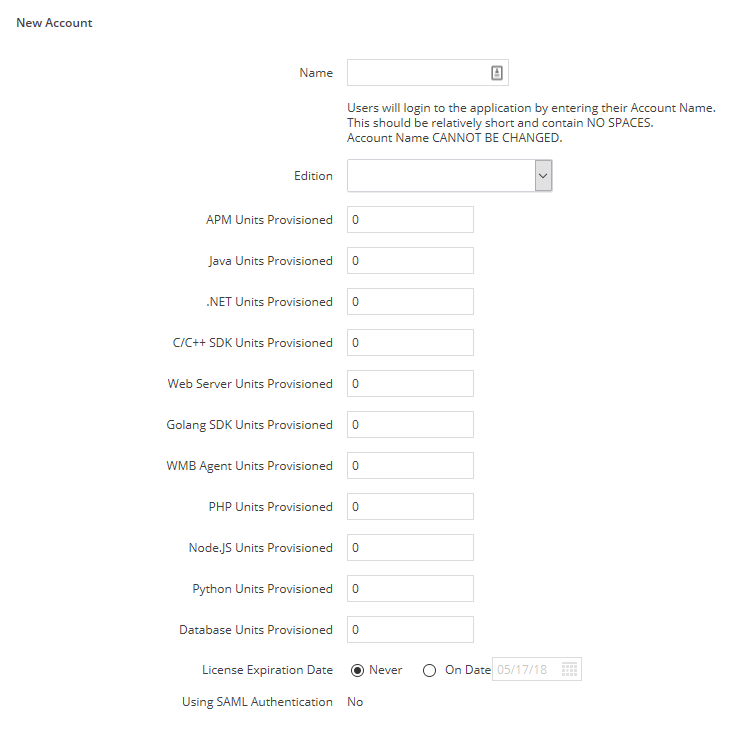 Once the account is set up you can log off this console and try logging in to your Appdynamics admin panel by visiting https://hostname:8090.
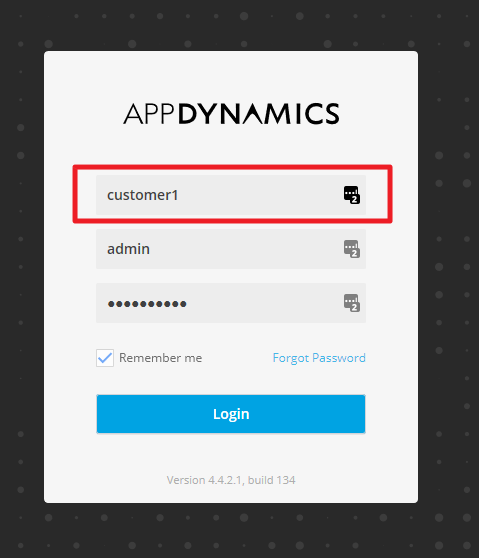
 If you would like to add agents to this newly created account you will have to use the new account name and its account access key ( can be found at the account setup in the controller admin console ) at installation time or just simply change these settings in the controller-info.xml if you already have agents on those servers. Using separate account name and account access key for each customer is how Appdynamics separates one account from an other.